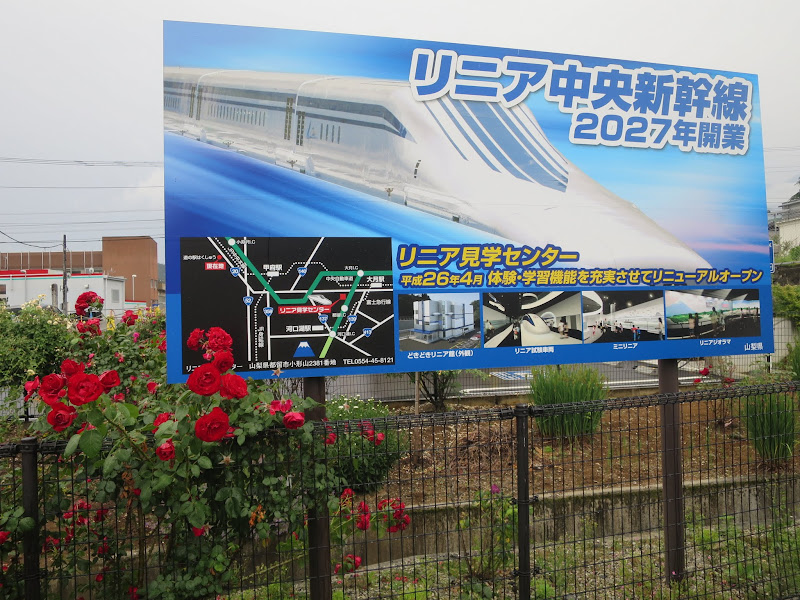
About Joe Wein

Software developer and anti-spam activist

Huawei Nexus 6P Battery Upgrade

I’ve had my Huawei Nexus 6P for about two years now. The combination of a great camera, an excellent screen, good performance and decent battery life has made this my best smartphone ever.

However, a couple of months ago something happened as the battery capacity appeared to have collapsed dramatically. Sometimes the phone would shut down only 5 hours after I had disconnected it from the AC charger when I left home, starting off supposedly fully charged! I had to always carry a USB battery and cable with me to not risk losing the use of my phone in the middle of the day.

Attempts to recalibrate the capacity indicator helped only insofar as the phone would shut down at 14% charge instead of say 55% charge, so there was slightly more warning, but the number of hours was still too short. This actually seems to be a common problem with the Nexus 6P, which otherwise is still a great phone.

It’s not uncommon for Li-ion batteries to significantly lose capacity after about about three years, but if it happens after less than two years as in my case, that’s not very good. Fortunately, replacement batteries are available and any competent phone repair shop will be happy to do the necessary surgery to replace a battery that is on its way out. Unfortunately the days when you could simply pop open the phone case without any tools and swap the battery yourself are long gone. This is a trend started by Apple and almost every other phone maker has since followed suit. I think it’s meant to get people to buy a new phone sooner, which is good for Apple and its competitors, but bad for consumers and for the planet.

There are Youtube videos that will show you how you how to open the Nexus 6P case and disassemble the phone to swap the battery. This involves the use of a hairdryer or heat gun to soften the glue that holds it all together as well as a plastic card and a small screw driver. As I did not feel adventurous enough to attempt this myself, I contacted several phone repair shops here in Tokyo. Repair King Japan replied. Though they they didn’t have the Nexus 6P battery in stock they were happy to order one for me. Once they got it, I dropped the phone off and two hours later I could have it back with a new battery. So far it’s looking good: It’s been 40 hours since the last full charge (with battery saver mode inactive) and it’s still showing 64% with about 3 days of power left 🙂

UPDATE: At 72 hours, it still had 23% charge left. At that point I connected it to a charger.

Hopefully with the new battery my Nexus 6P will be a great phone again for a few more years!

Bitcoin Scams – Stay Away!

The relative anonymity offered by virtual currencies such as Bitcoin (BTC) makes them an attractive vehicle for criminals.

Recently we’ve seen some scams that involve spam inviting you to send money to a Bitcoin address, offering ridiculously high rates of interest on this supposed investment. It’s a new take on the old High Yield Investment Program (HYIP) ponzi schemes.

In reality there is no way to ensure you get repaid once you’ve sent (virtual) money or that the scammers will be held accountable for the fraud. At best some early “investors” will have interest paid from deposits of later “investors”, who will definitely get stiffed. The scammers can simply exchange any deposited BTC into dollars at a Bitcoin exchange and walk away with the money.

Subject: blockchain doubler.

BLOCKCHAIN BY THE NUMBERS,

9/23/2017 12:58:33 from blockchain support

We are pleased to announce a new product – Bitcoin Doubler,
This is limited offer , 5-10 days.
Bitcoin Doubler is active from 23 September 2017 18:00 Pacific until September 29, 2017 18:00.

You can deposit today 0.2 minimum Bitcoins. Maximum amount of deposit by a natural or legal person is 50 Bitcoins. This is an amazing opportunity to win up to 40 Bitcoins if you invest 20 Bitcoins.

How do you double my bitcoins?

Our automated system gathers information from the blockchain transfers and cryptocurrency exchanges to study and predict the bitcoin price, our servers open and close thousands of transactions per minute, analyzing the price difference and transaction fees, and use that information to generate profit.

Investors who want to apply and invest on Blockchain, please make a Bitcoin transfer to:

147SBxHfuN2KJaLMNGo852gJCm5gCdNvq6

How long does it usually take to receive doubled bitcoins?
We pay to you 10% every hour for 100 hours.
HINT : users who deposit more the 10 bitcoins will get bitcoins doubled in maximum 5 minuts.
users who deposit lower then 10 bitcoins will get bitcoins doubled after 6 confirmations.

To trace your investment please send an email to bitcoin-doubler@blockchain.info , And subject to put your Bitcoin address. The Bitcoin address must be the same as you used to invest. If you put in the email a Bitcoin address you not used to making investments, you will only receive an email with your status. If you submit a correct email with a correct address Bitcoin (the same used to make your placement), you will receive an email with the total Bitcoin invested and the date and time of your payment will be made.

Hurry up! This is a Iimited license, unique opportunity.

Here’s another one, using the name of one Bitcoin exchange:

Subject: WEX. important news!

WEX. Rising ex. BTC-e,

9/22/2017 13:20:27 from admin

Team of WEX is glad to welcome you on our new platform!

This is our first official announcement!
We thank all ex-users of BTC-E for their patience at such a difficult moment for all of you guys.

All users who deposit on our platform will get in 2 days , 40% bonus.
Clients who want to apply now on WEX, please make a Bitcoin transfer to:

1QGbpENUv3xJCtiqTcUPM1Vvnwx5FRR6uZ

Hurry UP ! 4510 clients allready deposit , we have now 4110.562 BTC
Due to a large demand among our customers, we expand our bonus for 10 days.

Check status here : https://blockchain.info/address/1QGbpENUv3xJCtiqTcUPM1Vvnwx5FRR6uZ

We will refund your first deposit with dividends withing 2 days at 00:00 Pacific Time. (For example: investing 3.00 Bitcoins today will return 5.20 Bitcoins after 2 days at 00:00 Pacific time) The profits are withdrawn immediately and Blockchain or WEX waives all rights for 1st level investments.

To trace your investment please send an email to btc-invest@wex.nz , And subject to put your Bitcoin address. The Bitcoin address must be the same as you used to invest. If you put in the email a Bitcoin address you not used to making investments, you will only receive an email with your status. If you submit a correct email with a correct address Bitcoin (the same used to make your placement), you will receive an email with the total Bitcoin invested and the date and time of your payment will be made.

Hurry up! This is a Iimited license, unique opportunity.

Thank you, that you believed in us. Thank you that you are with us.
With respect, WEX team.

Any offer arriving via spam that mentions Bitcoin: Stay away from it!

The MKT Negocios Spammers in Argentina

For years I’ve been tracking spam from Argentina that is using yopmail.com / yopmail.net disposable sender addresses.

Unlike a lot of spam sent from other countries, the advertised companies are mostly legitimate businesses, some of whom may be clueless that mail is being sent to unwilling recipients all over the globe who may not even speak Spanish.

The sender IPs tend to be on cablevision.com.ar, for example from the 190.188.0.0/15, 190.190.0.0/15 and 181.164.0.0/14 ranges.

The spamming company owns several domains, but these don’t normally show up in sender addresses or links, e.g.:

mktnegocios.net:

Domain name: mktnegocios.net
Registry Domain ID: 186887
Registrar WHOIS Server: whois.dattatec.com
Registrar URL: http://dattatec.com
Updated Date: 2017-09-20T01:00:53Z
Creation Date: 2011-09-19T11:24:51Z
Registrar Registration Expiration Date: 2018-09-19
Registrar: dattatec.com SRL
Registrar IANA ID: 1388
Registrar Abuse Contact Email: abuse@dattatec.com
Registrar Abuse Contact Phone: +54.3415169000
Domain Status: OK
Registry Registrant ID: DC282919DTT
Registrant Name: Cid Ricardo Ernesto
Registrant Organization: Cid Ricardo Ernesto
Registrant Street: Islandia 4393
Registrant City: Lanus Oeste
Registrant State/Province: Buenos Aires
Registrant Postal Code: 1824
Registrant Country: ar
Registrant Phone: +54.42679611
Registrant Phone Ext:
Registrant Fax:
Registrant Fax Ext:
Registrant Email: ricardocid@hotmail.com

mktnegocios.info:

Domain Name: MKTNEGOCIOS.INFO
Registry Domain ID: D42311407-LRMS
Registrar WHOIS Server:
Registrar URL: http://dattatec.com
Updated Date: 2017-09-19T22:22:35Z
Creation Date: 2011-09-19T11:25:09Z
Registry Expiry Date: 2018-09-19T11:25:09Z
Registrar Registration Expiration Date:
Registrar: Dattatec.com SRL
Registrar IANA ID: 1388
Registrar Abuse Contact Email:
Registrar Abuse Contact Phone:
Reseller:
Domain Status: ok https://icann.org/epp#ok
Domain Status: autoRenewPeriod https://icann.org/epp#autoRenewPeriod
Registry Registrant ID: C114356985-LRMS
Registrant Name: Cid Ricardo Ernesto
Registrant Organization: Cid Ricardo Ernesto
Registrant Street: Islandia 4393
Registrant City: Lanus Oeste
Registrant State/Province: Buenos Aires
Registrant Postal Code: 1824
Registrant Country: AR
Registrant Phone: +000.42679611
Registrant Phone Ext:
Registrant Fax:
Registrant Fax Ext:
Registrant Email: ricardocid@hotmail.com
Registry Admin ID: C114356985-LRMS
Admin Name: Cid Ricardo Ernesto
Admin Organization: Cid Ricardo Ernesto
Admin Street: Islandia 4393
Admin City: Lanus Oeste
Admin State/Province: Buenos Aires
Admin Postal Code: 1824
Admin Country: AR
Admin Phone: +000.42679611
Admin Phone Ext:
Admin Fax:
Admin Fax Ext:
Admin Email: ricardocid@hotmail.com
Registry Tech ID: C114356985-LRMS
Tech Name: Cid Ricardo Ernesto
Tech Organization: Cid Ricardo Ernesto
Tech Street: Islandia 4393
Tech City: Lanus Oeste
Tech State/Province: Buenos Aires
Tech Postal Code: 1824
Tech Country: AR
Tech Phone: +000.42679611
Tech Phone Ext:
Tech Fax:
Tech Fax Ext:
Tech Email: ricardocid@hotmail.com
Registry Billing ID: C114356985-LRMS
Billing Name: Cid Ricardo Ernesto
Billing Organization: Cid Ricardo Ernesto
Billing Street: Islandia 4393
Billing City: Lanus Oeste
Billing State/Province: Buenos Aires
Billing Postal Code: 1824
Billing Country: AR
Billing Phone: +000.42679611
Billing Phone Ext:
Billing Fax:
Billing Fax Ext:
Billing Email: ricardocid@hotmail.com
Name Server: NS21.DATTATEC.COM
Name Server: NS22.DATTATEC.COM
Name Server: NS3.HOSTMAR.COM
Name Server: NS4.HOSTMAR.COM
DNSSEC: unsigned
URL of the ICANN Whois Inaccuracy Complaint Form: https://www.icann.org/wicf/

mktnegocios.com.ar:

Datos del dominio
Nombre y Apellido: DALLAVIA FERNANDO LUCIANO VICTOR LUCIANO VIVTOR
CUIT/CUIL/ID: 20220483895
Fecha de Alta: 23/01/2017
Fecha de última Actualización: 24/01/2017
Fecha de vencimiento: 23/01/2018

On their website they explain to their prospective customers that they will spam to harvested addresses:

BASE DE DATOS :

Contamos con bases de datos argentinas y del exterior validadas la totalidad de las mismas cada 15 dias, asegurandonos asi la completa funcionalidad y validez de los emails. Los datos se obtienen a traves de extracciones de emails por medio de software en la web.

Translation:

Databases

We have Argentine and foreign databases completely validated every 15 days, thus ensuring the full functionality and validity of emails. The data is obtained through extraction of emails through software on the web.

Owners of harvested addresses have by definition not signed up to receive bulk mail. Their various mailing package go as high as 16,000,000 emails…

See also:

If you’re a business in Argentina trying to decide on online advertising, hiring a spammer like this will damage your reputation and may end up getting your domains blacklisted.

Updated jwhois.conf File for CentOS for New gTLDs

The whois command on CentOS 6.x and 7.x doesn’t handle queries for many domains in new Top Level Domains (TLDs) that were added by ICANN in the last few years.

Domains from many of these new TLDs are selling as cheap as $0.99 a pop, making them attractive to snowshoe spammers who create them in large numbers. As a spam researcher, I see lots of new spam domains from TLDs such as .xyz, .online, .top. .club, .services, .win, .site, .bid, .life and .trade.

WHOIS is an important tool for me to track the domain registrants. CentOS uses jwhois as its WHOIS client, which relies on a configuration file to tell it what servers to query for detailed information. The configuration file that comes with recent CentOS versions is woefully out of date.

I have gone through the currently existing TLDs and counted 466 of them that are not supported by jwhois but appear to have a valid WHOIS server. I have been able to verify for about half of these TLDs that the WHOIS server works and have added them to my configuraion file, which you can download here.

Many of the rest of the new TLDs are hosted on Neustar, which performs rate limiting on lookups. Because of that I didn’t fully verify functioning of all those hosts, but I verified that CNAMEs exist for the WHOIS hosts that redirect to Neustar WHOIS servers and tested a small sample of those TLDs.

Karl Marx on Donald Trump

Karl Marx on Donald Trump:

“He behaved like an unrecognized genius, whom all the world takes for a simpleton.”

Actually, he wrote that about French president Louis-Napoléon Bonaparte, nephew of Napoleon I, who in an 1851 coup turned the French Second Republic into the authoritarian Second Empire and had himself crowned Emperor Napoleon III.

Getting Rid of the EMUI Launcher on the Huawei P9 Lite

Last time I switched mobile provider here in Japan, I signed up for a contract that included a Huawei P9 Lite. My biggest grip about it is its non-standard EMUI interface that runs on top of Android 6.0.1.

Previously I was using a Nexus 5, which had worked OK for me, though the picture quality of its camera was rather mediocre. One nice thing about the Nexus 5 was that it runs stock Android, with no customization. Its user interface is identical to that of my other phone, a Nexus 6P.

I really prefer stock Android without OEM customization. For one, stock Android means you can get version upgrades sooner and for longer (or at all!).

I found the EMUI launcher confusing. For example, I did not see any easy way to launch an app that didn’t have a desktop link.

It’s possible to switch from EMUI to the standard Google launcher. Here are the steps I performed:

1) Install “Google Now Launcher” via Play Store.

2) Swipe down, select Shortcuts and then Settings

3) Enter “def” into the search box at the top (may have to scroll up first)

4) Select “Default app settings”

5) Select “Launcher” and pick “Google” instead of “Huawei Home”. Ignore the warning that tries to scare you into sticking with EMUI (you can always change back by following the same steps and selecting “Huawei Home” again).

6) There you go!

The irritating long push home button

Another irritation that seemed to happen more on the Huawei than on my other phones was the Google screen that pops up (seemingly randomly) when I just try to go to the home screen. It has a “Want answers before you ask?” prompt at the bottom and a Google search box with voice search option at the top. I really don’t need this screen because the standard Android home screen already has a Google search bar at the top. I’d rather have the home screen with all my app shortcuts come up reliably whenever I push the Home button!

It took me a while to figure out that this Google search screen comes up on what the phone thinks is a long push of the Home button, which has a different meaning from a regular short tap. If that happens, just tap again and it will go to the home screen. Or just make it your habit to double tap the home screen to go to the home screen, then this should never happen 🙂

Adding Free SSL Certificates for HTTPS To Your Websites

I recently received a warning email from Google:

“Starting October 2017, Chrome (version 62) will show a ‘NOT SECURE’ warning when users enter text in a form on an HTTP page, and for all HTTP pages in Incognito mode.

The recommended solution was to migrate the affected website(s) to HTTPS. This requires an SSL certificate. There are many companies selling those for hundreds of dollars. I didn’t really want to spend that money.

It turns out there is a free alternative: The Let’s Encrypt project (https://letsencrypt.org/) provides free SSL certificates with just enough functionality to run SSL with current browsers. It also provides automated tools that greatly assist you in obtaining and installing those certificates.

I had a default SSL host configured on my Apache 2.4 installation (inherited from a different server running Ubuntu) that I had to manually remove.

Then, when all virtual hosts only had port 80 (HTTP) enabled, I could run the certbot tool as root:

# certbot --apache

It enumerates all host names supported by your Apache installation. I ran it repeatedly, for each domain and the corresponding www. host name (e.g. joewein.net, www.joewein.net) in my installation and verified the results, one at a time. It will create a new virtual host file in /etc/httpd/hosts-enabled for those hosts for port 443 (HTTPS). I appended the content of that file to my existing port 80 (HTTP) virtual host file in /etc/httpd/hosts-available for that host name and deleted the new file created by certbot. That way I can track all configuration details for each website for both HTTP and HTTPS in a single file, but this purely a personal choice.

All it takes is an Apache restart to enable the new configuration.

You can test if SSL is working as expected by accessing the website with a browser using https:// instead of http:// at the start of the URI.

If you have iptables rules for port 80, you may want to replicate those for port 443 or the certificate generation / renewal may fail. Also, you want to make sure that SSLv3 is turned off on your Apache installation, to protect against the POODLE vulnerability. This required the following setting in ssl.conf:

/etc/httpd/conf.d/ssl.conf:SSLProtocol all -SSLv2 -SSLv3

The free certificates will expire in 90 days, but it’s recommended to add a daily cron job that requests renewals so that an updated key will be downloaded after 60 days, long before the old key expires. Once that is in place, maintenance of SSL keys will be totally automatic.

UPDATE (2017-11-01): If you’re using WordPress on your website, you should change the WordPress base URI to HTTPS too. To do that, log into the WordPress Dashboard. In there select Settings > General. Change the “http://” in the WordPress Address (URI) and Site Address (URI) fields to “https://” and click the Save Changes button. This ensures that any messages from WordPress to you will include secure URIs.

Disc brakes on my Bike Friday (part II)

As I explained here almost two years ago, I have had the front brake of my Bike Friday replaced with a disk brake, an upgrade that involved installing a new fork with disk brake tabs. Now I’m having the same upgrade done one the rear:

I needed to replace the rear wheel anyway because after 37,000 km its rim was worn out. The aluminium of the brake surfaces was already worn past the wear markers. I decided, this was a good time to switch not only the rim but the brake too. With disc brakes, a well built rim will basically last forever. The brake wear will be on the rotor, but that is a cheaper part that can be replaced without the need for a full wheel rebuild. But more importantly, disc brakes are much more effective in the rain, where they are more predictable. I was reminded of that fact again when I descended a winding 20 km from Mt Norikura in the rain last month.

Originally I thought I could get IS disc tabs at the rear by simply swapping the rear triangle, which is a separate hinged part of the folding bike frame, but as it turns out Bike Friday needs to build the main tube and its hinge together with the rear triangle to ensure they will be properly aligned.

I went ahead and placed an order. A couple of weeks later the new main tube and rear triangle arrived. Tokyo Bike Friday dealer ehicle will be swapping all other parts from the existing bike to the new hinged section that has the disc tabs.

I bought a second Shimano BR-CX77 disc brake calliper. I still had a 140 mm centerlock rotor that I had bought two years ago as well as the matching IS adapter. The smaller rotor should be sufficient at the rear, especially with the smaller 20″ wheels. Heat dissipation should be less of a problem for a rear brake, which normally doesn’t have to work as hard as a front brake. I never had any heat problems with the 160 mm rotor at the front.

GS Astuto, my favourite wheel builder, built me a new rear wheel based on the Shimano Deore FH-M615 rear hub and an AlexRims DA22 rim (same as originally came with the bike). The disc brake wheel uses an O.L.D. (Over Locknut Dimension) of 135 mm, but the existing rim brake rear triangle uses 130 mm. Therefore installing the new wheel in the existing frame before the Norikura ride required some effort, but it worked OK. With the new rear triangle that issue will go away.

Once the conversion will be complete, I’ll actually have a spare main tube and rear triangle, a spare fork, two spare rim brakes and two spare hubs. The only frame parts missing to a complete non-disc brake frame will be the steerer and the folding seat tube 🙂 Nevertheless, doing it this way will have been worth it.

Instead of buying a new bicycle, I could first try out at the front what difference a disc brake would make, making only the minimal investment. I never had to send my bike back to the US for a few weeks for an upgrade or pay shipping costs either way. I only lost the use of the bike for a short period for each of the upgrade steps.

I’m looking forward to riding my upgraded bike this weekend, when the work will be complete! 🙂

Disc brake pad and rotor wear

It looks like I get about 6,000 km of useful life out of the disc brake pads on the front of my main bicycle. That’s about 9 months for me (I ride all year round, about 8,000 to 10,000 km per year).

Two years ago I switched my Bike Friday Pocket Rocket to a disc brake on the front by replacing the fork and the front wheel. 1 1/2 years ago I received my Elephant Bikes National Forest Explorer (NFE), a low trail randonneur bike with disc brakes. 9 Months ago I switched the NFE from TRP Spyre mechanical disc brakes with metallic pads to Shimano hydraulic brakes with resin pads. These pads had now worn out, see picture above.

Along with the brake pads I also replaced the front rotor, as the old one had worn quite thin.

Most of the 7,000 km that I had done on the TRP Spyre brakes I had been using metallic pads, as the factory resin pads wore extremely rapidly: I had to keep adjusting the brakes after each Saturday long ride (typically 130-200 km). The metallic pads needed less attention but were very noisy in the rain.

My experience with the Shimano BR-RS785 brakes was much better. As hydraulic brakes their pads were self adjusting. There weren’t any noise issues. Wear is quite acceptable: One set of resin pads every 9 months is not too bad and I expect the new brake rotor will last even longer than 13,000 km / 20 months now that I am only using resin pads. On top of that the modulation on the hydros is great and they need very little effort. I could not be happier!

It is good to have real-life figures from actual use as to how quickly parts will wear on the bike so you can do preventive maintenance. It is better to replace a worn out pad at home when you know that it will be due for replacement soon, rather than finding out on a mountain descent that suddenly you’ve got nothing left to stop you! 🙁

Likewise, I regularly replace shifter cables (about once a year), before they wear out enough to break inside the brifters during a ride away from home, as happened twice to me before I learnt that lesson.

In the past I have been quite easygoing about replacing worn out bicycle chains, but a chain that has “stretched” will wear out your chain rings or cassette more quickly. Chains do decrease in robustness with increasing numbers of gears (from 8 speed to 11 speed) as they increasingly become narrower, so I will probably be replacing my 11 speed chain annually too.

Jōmon Sugi, the hard way

Eight years ago I visited Yakushima island near Kyushu/Japan with my family. We did a lot of hiking to see the ancient Cryptomeria trees in the lush green mountains, but we did not try to go to Jōmon Sugi (縄文杉), the oldest and biggest tree on the island. It is estimated to be around 2000-7000 years old. Visiting it involves an all day hike. At the time I thought it was a bit far for my kids to hike.

Most people take a bus to the Anbo trail. Starting from the Arakawa trail head they walk along the tracks of the old narrow gauge railway previously used for logging. From there they follow the Okabu trail, which consists of a combination of dirt tracks, wooden steps and board walks. The route passes by Wilson’s Stump, the hollow remains of an even bigger tree, the size of a small living room.

The round trip on this route takes about 9-10 hours. People often leave their hotels at 04:00 to catch the first bus to the trail head at 05:00. The last return bus from the trail head leaves at 18:00.

Looking at the map (PDF here), I saw that one could avoid the buses by starting at Shiratani Unsuiko, climbing over the Tsuji Toge Pass and joining the Anbo trail about halfway to the turnoff for the Wilson stump. It involves a lot more climbing and descending, but the up side is that one is not tied to the bus schedule, no need for bus tickets and last but not least, Shiratani Unsuikyo is one of the most beautiful parts of the island. Furthermore, not far from Tsuji Toge Pass lies Taiko Iwa, a rock overlooking a mountainous valley with spectacular views.

We left the hotel in Miyanoura at 06:30. The hotel had prepared two lunch boxes for each of us, one with breakfast that we had in our room and one with lunch for during the hike. After driving up the steep road to Shiratani Unsuikyo high in the mountains, we parked the car in the car park and started to hike.

It was hot and humid but at least we were mostly walking in the shade of the dense forest.

At the Shiratani mountain hut I filled up with water. From the pass we climbed the trail up to Taiko Iwa. It was at least half an hour of detour, but we spent quite a bit more on taking pictures at the top.

A tour guide we met there told us we were probably a bit too late already to still make it to Jōmon Sugi in time to be back at the car park by the evening. Still, we decided to push on and see by what time we could make it to the Wilson stump. I reckoned, if we could make it there by noon we’d be at Jōmon Sugi by 13:00 and back at Shiratani Unsuikyo by 18:00, with about an hour spare before it got dark this time of the year.

Personally I find descents on foot harder than climbs, because they exercise muscles that only get used going downhill whereas climbing is much more similar to the kind of cardio exercise I get from cycling that I’m used to.

After about half an hour of descent we reached the old railway tracks, with wooden planks in the middle that made it easy to walk fast.

After maybe an hour we reached the turn-off for the Wilson stump. From here the course was a lot harder again. Especially the stairs were very hard on the legs.

We encountered some people heading back already. Many groups of people were resting by the side of the trail, either already return from or still heading to the tree.

There are two large viewing platforms near the tree, one below it on the hillside, one above it. For protection you can’t approach the tree itself anymore.

It was still a little before 13:00 when we started the hike back. With about six hours until sunset I was pretty sure we would make it, but it was going to be hard. There was a lot of up and down back to the Wilson stump and the Anbo trail. We rested a while at the Wilson stump, after going inside and taking pictures (there were about 8 people inside the stump at the time).

We were totally drenched in sweat by then. I had brought a towel to wipe my sweat but it was already soaking wet. All my clothes were soaked through. Paper tickets in my backpack dissolved.

I slowed down on the Anbo trail. With the goal of making it to the tree before cut-off time gone, I just wanted to make it to the end with the least amount of pain.

We rested again at the public toilets before the climb back up to the pass. Again I found the climb easier than the descent because my wife and kids slowed down more climbing while I had fallen behind on the descent.

The last kilometers from the Tsuji Toge Pass down to the Shiratani Unsuikyo car park were the hardest. All my muscles were sore.

A few hundred meters before the goal we soaked our feet in the cool water.

Finally we made it to the car, well before 18:00.

On the way down to the coast we passed some Yakushima monkeys. There are many of them all over the island, but especially on the mountains and on the west coast.

My legs were sore for several days after the hike (probably not helped by a canyoning tour the very next morning, which by itself was a lot of fun).

It was a great adventure to combine Jōmon Sugi with Shiratani Unsuikyo and Taiko Iwa. The latter two are definitely a local highlight, and much more interesting than Jōmon Sugi, which even though it’s impressive, is no match for the variety of stunning views at Shiratani Unsuikyo.

One of the hotel staff, who was a keen hiker, told us that even though he had also done the combined route, he had only ever done it once because it’s so hard. I can understand that.

If you want to see Jōmon Sugi, the conventional route on the Anbo trail is much easier, but then you should definitely also go and see Shiratani Unsuikyo separately.

When I next visit Yakushima, I probably won’t be hiking to Jōmon Sugi again, but I would love to visit Shiratani Unsuikyo again, perhaps climbing up from the coast by bicycle. A bicycle loop of the entire coastal road around the island (ca. 130 km) is also on my agenda for a future trip.