Cycling on Mount Fuji Subaru line

I love Mount Fuji since my first trip to Japan in 1990. I have enjoyed numerous views of it from near and far and several times drove up to the fifth station (go-gome, also named “fifth step”) of the Kawaguchiko hiking trail. This is as high as you can go by car before walking to the top.

All Fuji hiking trails are numbered from first to tenth station. The first station is the starting point where pilgrims on foot used to start their journey in the old days. The tenth station is the crater rim, where a Shinto shrine is located.

The Kawaguchiko fifth station at over 2300 metre is the second highest station accessible by car or bus. It lies just above the tree line. The hiking trail from there winds up the exposed volcanic cone above the station.

Fuji Subaru line

Access to the fifth station is by a toll road (2000 yen = about US$27 by car, 200 yen = US$2.70 by bicycle), called the “Fuji Subaru line”. I’m not sure, but I always assumed its name was connected to Fuji Heavy Industries (富士重工業株式会社), the makers of Subaru cars. Officially the road is named after the Japanese name of the Pleiades star constellation (a.k.a. the “Seven Sisters”), but those are also the stars you see in the Subaru car logo, as it is also named after the constellation. The road was built in 1964, so maybe nobody really knows these days. I was passed by 2 or 3 Subaru Impreza WRX on the way up, so regardless of its origin perhaps the name does attract Subaru drivers 😉

Despite running up the highest mountain in Japan, the Subaru line is not quite the highest Japanese road accessible by car, but it doesn’t miss that record by much.

As a staging post for hikers, the fifth station offers car parks, toilets, souvenir shops, a shrine and shops that sell anything a hiker might need who would hit the trail to the peak at 3776 metres. The station offers great views of the “five lakes”, the Southern Alps and many other mountains in the distance, that make it well worth a visit even if you’re not going to climb to the peak. Often you will find yourself above the clouds, like in an airplane. On the other hand, the higher regions of Fuji may be shrouded in clouds even when elsewhere the sky is clear. This makes clear views of Fuji and from Fuji even more precious.

During the peak season in early to mid August, private cars are banned from the road because of insufficient parking space up there. Only buses and taxis can use the road then. In the summer you sometimes have to wait in line for parking. Only when enough cars come down the mountain can you advance further up. Earlier or later in the year the upper sections of the road may sometimes be closed due to snow, but in principle the road is open all year round, with daily opening hours varying by the season.

Going by bike

During my earlier visits I had seen quite a few cyclists on that road. Invariably they were on light-weight road bikes, wearing bike shorts and bike jerseys and they would not have looked out of place in the Tour de France. Somehow, if you get a road bike in Japan, there seems to be an unwritten rule that you must wear the whole kit to look like a pro… Anyway, I felt the greatest respect for these cyclists because I knew how long and steep the road was, even in my car that did all the hard work for me. It’s about 29 km from Fujiyoshida down at the base to the end of the road up there.

In August 2011 I finally fullfilled a long held dream and climbed Mount Fuji. I made it to the top and back down again. Three weeks ago I got my Bike Friday Pocket Rocket, a road bike that folds. Earlier this year my son Shintaro had suggested we should try the Mount Fuji Hill Climb, a bike race every year in June that starts at Mount Fuji Hokuroku Park near the Subaru line toll gate and finishes at the fifth stage. It’s 24 km in total, with a 5% average, 7.8% maximum incline.

After two rides of 48 and 55 km on weekends on my new bike I thought I might give Mount Fuji a try, but was more concerned about getting down again than making it up there: If I got too exhausted, I could always turn around at any point, but if the long descent turned out to be too hard on the bike’s brakes, wouldn’t I be in trouble?

I did some research online and after some valuable advice from members of the Tokyo Cycling Club forum, I decided to give it a try because 5% is still quite manageable. Shintaro was keen to join me. The weather forecast for Saturday was excellent: Clear skies, sunny, with 19C at the bottom, but I knew it was going to be much colder at the top, especially on the way down again, when my leg muscles weren’t going to supply much heat.

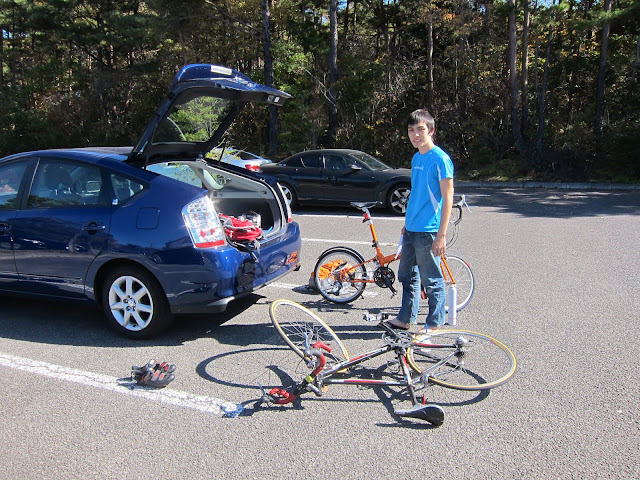
After breakfast we packed our two bikes into the back of the Prius and drove to Fuji. With Saturday traffic the 100 km from Setagaya/Tokyo to Fujiyoshida interchange took us 3 hours, so we only got there around noon. After setting up the bikes in the car park of the Mount Fuji visitor center we did some food shopping and ate lunch outside a convenience store near the interchange and the Fuji-Q Highland amusement park. The visitor centre was not too busy this time of the year, but there is also a large car park nearby for the summer season (1000 yen per day), for park and ride with buses. From Fujiyoshida IC it’s about 4 km uphill to the toll gate.

I tracked our ride using the free iMapMyRide application. It runs on my Google Nexus S Android phone, mounted on the handle bar using a Minoura iH-100-S smartphone holder. I used about half the battery charge for the roughly 4 1/2 hour climb, with the phone set to airplane mode because there wasn’t going to be any cellphone reception anyway. When we got back to the car, I reenabled the network and uploaded the data to the TrackMyRide.com website, which does a good job of mapping rides and displaying information such as average speeds for each kilometer of the trip, kcals burnt, altitude profile and gain, etc. My only minor problem with the app and website is that it doesn’t deal properly with time zones, so some rides show up one day off in the calendar and the start and end times are not from your local time zone.

My climbing speed was moderate but steady, mostly between 8 and 11 km/h and I was mostly in the 2nd or 3rd lowest gear. I drank about 1.5 litres of water and stopped several times for some carbohydrates.

On the way up I did a radiation check with my Ecotest Terra-P MKS-05 geiger counter at the edge of the forest surrounding the road and the number was no higher than back in Tokyo where we lived.

Pictures from the ride

Here we were taking a break on the way up at the first stage rest area.

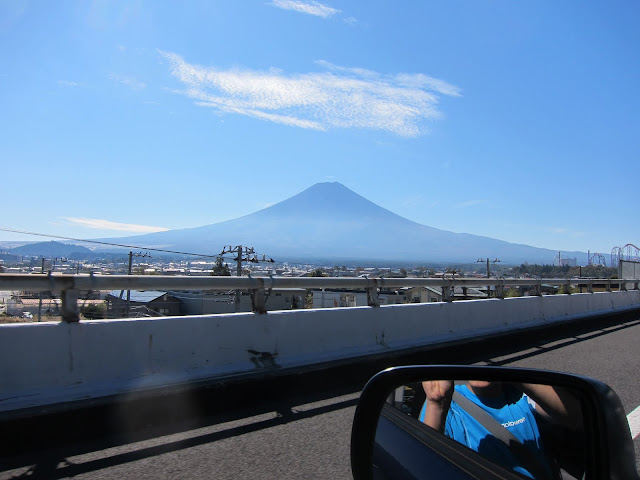
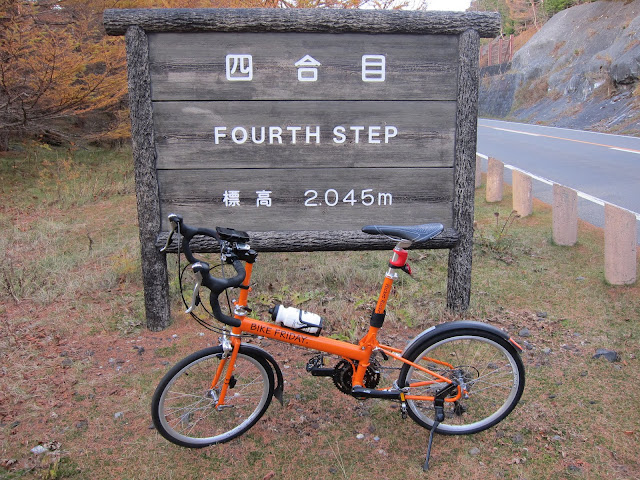
Here we’re just over half way to the top, already enjoying splendid views.

Autumn colours everywhere:

Looks like a thistle:

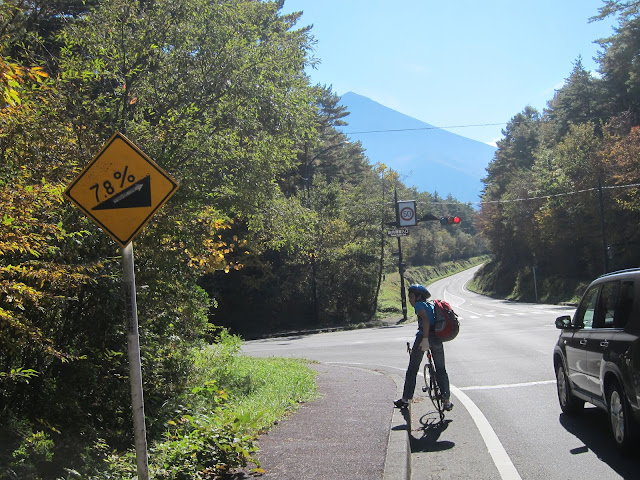
We’re 80% there: about 6 km and 300 metres of altitude to go.

I loved these views.

Yeah! We made it! 🙂

After 29 km and almost 1500 altitude metres, we’re at the fifth stage.

Entrance to the small shrine between souvenir shops.

The new moon rising over Mount Fuji. Time to head down again before it gets completely dark!

Descending from Mount Fuji

We changed into our warmest clothes and set off for the one hour descent. I mostly coasted at 35-40 km/h, applying the brakes only before curves. I wish I had warmer gloves and a stronger headlight (or even better, more daylight), but we made it down OK.

At 18:00 the visitor centre car park with our car inside was already closed with a chain, but fortunately it wasn’t padlocked. We packed the bikes back into the car, went for some sushi and then headed back to Tokyo.

It was a great experience. Thinking about the Mount Fuji Hill Climb in June, I loved doing Subaru line at my own pace, with time to take pictures. If you do the race, maybe you also want to come back some other time to simply enjoy the great views on this majestic mountain, without 5000 other cyclists around you…

My Terra-P dosimeter (MKS-05) by Ecotest

Yesterday my geiger counter arrived here in Japan. It is a Terra-P dosimeter made by Ecotest, a company based in L’viv/Ukraine, about 300 km west of Chernobyl.

I bought the device on eBay from a supplier in Australia for US$399 including shipping. It arrived within 9 days and seems to work well. Although the buttons on my Terra-P are labelled in Cyrillic (either Russian or Ukrainian) and so is the manual, English manuals for it are easy to find online, so that’s not really a problem.

The Terra-P is a consumer grade dosimeter, so it’s not quite as versatile or as precise as professional devices costing $1000 or more, but it covers the basics very well. Its power source are two AAA-batteries, accessible via a lid at the back of the unit, which are easy to replace. It measures gamma rays and is suitable for checking for caesium contamination.

The user interface consists of an LCD, two buttons and speaker. One push of the right hand button (“режим” = mode) switches the dosimeter on and puts it into the measuring mode. The display switches to a microsievert per hour (µSv/h) readout. For the first 70 seconds the resulting number blinks, as it averages the dose over that period and the number gradually becomes more meaningful. After the initial sampling period, the number displayed will always be the average of the last 70 seconds, so you can move it from location to location and will get a decent result provided you wait for about a minute.

After several minutes the device enters power save mode, in which it continues counting radioactive decays, but the LCD is off and less power is used. To turn it off completely when it’s active, push the mode button once more and then push and hold it for four seconds, until the LCD blanks.

The Terra-P also has a user-settable alarm threshold (default: 0.30 µSv/h) and a clock mode. The built-in speaker usually makes one click for every gamma photon detected and sounds an alarm if the radiation exceeds the alarm threshold.

Checking my home after unpacking the device, I found the radiation level was a little higher than the 0.055 µSv/h reported for Tokyo by the local government, but still somewhat lower than the 0.10 µSv/h in my home town in Germany. On the other hand, I was relieved to see the wooden deck outside our living room was no more radioactive than inside the house. As expected, the gutters at the edge of the road, where rain water drains into the sewers, was more radioactive, with about 0.20 µSv/h, which is still far from alarming.

See also:

Radiation map of Japan

The Japanese government has published online map data about radiation levels in Eastern Japan. You can zoom in and out, scroll around and select data from:

  • Background radiation in microsievert per hour
  • Contamination by caesium 134 and 137 combined (Cs-134+Cs-137) in becquerel per square metre
  • Contamination by caesium 134 (Cs-134) in becquerel per square metre
  • Contamination by caesium 137 (Cs-137) in becquerel per square metre

The data was collected via helicopter flights carrying instruments that detect gamma radiation of different energy spectrums, allowing a breakdown by isotopes causing it.

There are the following data sets:

  • April 29
  • May 26
  • July 2
  • Miyagi prefecture, July 2
  • Tochigi prefecture, July 16
  • Ibaraki prefecture, August 2
  • Chiba and Saitama prefecture, September 12
  • Tokyo and Kanagawa prefecture, September 18

Click on this link:

either the online maps or download PDF files of the maps and click on “同意する” (“I do agree”, the left button) to get access.

The government is planning to extend the radiation survey to the whole of Japan, not just within about 250 km of the wrecked reactors as is currently the case.

See also:

Good bye, Dennis Ritchie!

Back in the early 1980s I learnt programming in C by reading “Kernighan and Ritchie”, as everyone around me called this book then: “The C programming language” by Brian Kernighan and Dennis Ritchie.

It is no exaggeration to say that C and its derivatives are to computers what hydrogen is to the universe.

Dennis Ritchie, who passed away today at the age of 70, was a co-creator of both the C programming language and of the Unix operating system, after which open source Linux is modelled today. Mac OS X and iOS are direct descendants of Unix (NetBSD), while Android, which runs on millions of smart phones, is based on Linux. Virtually every operating system that matters these days (including all versions of Microsoft Windows) is written in C or C++ or another C-derived language.

Dennis Ritchie may not have become as much of a household name as Steve Jobs, but the software he created probably brought about much more fundamental changes than anything Steve Jobs did, and in fact most of what Jobs created would have been unthinkable without either C or Unix.

See also:

Report sub4sub.com spam

After uploading a video clip of mine to YouTube for public viewing, I received the following message via YouTube:

Gracehapp has sent you a message:

whats going on? great video
To:[my YouTube ID and 19 others]

howdy,

wow i like ur channel im gonna sub to ya..if you want more subs i used a website

called sub4sub.com you can enter everyday im after getting 300 subs since yesterday.

keep the vids coming

If you receive a message like that (even with other domains in place of ‘sub4sub.com’), report it to YouTube as spam. To the right of the YouTube logo at the top of the message you will see:

help center | e-mail options | report spam

click on that “report spam” link.

It looks like the same spammers previously used the domain earnsubscribers.com, which was advertised using identically worded messages.

Google Photos links to Google+ Photos instead of Picasa

I am a Google Picasa user who earlier this year also joined the Google+ social network. I use Google Picasa to share photographs and videos with friends and family. Google+ makes it easy to share pictures and albums with specific selected circles of friends.

Morning light on Mount Fuji

Until recently, I could conveniently launch the Picasa Web Albums site by clicking “Photos” in the Google navigation bar at the top of, for example, Gmail. A few days ago this changed and the link now takes me to the Google+ photo viewer. For me the new behaviour is inconvenient, because there are many things I can do with my albums in Picasa Web Albums that I can’t do from the Google+ photo viewer (which is really just meant for viewing and little else).

If you’re missing the Google link to Picasa, the simple workaround for now is to bookmark this URL:

https://picasaweb.google.com/home

and use it whenever you want to invoke Picasa Web Albums. Apparently, Google is working on integrating the oogle+ photo viewer with Picasa Web Albums more closely, so eventually the Picasa functionality will become available under “Google Photos” again.

On the positive side, it appears that the integration between Google+ and Picasa Web Albums has practically eliminated storage limitations for Picasa users. Facebook already offered unlimited picture uploads as long as each album set was limited to 200 pictures. With Picasa and Plus, only pictures above 4 Mpx or videos above 15 minutes count towards the limit. As Picasa by default resizes all uploaded pictures to 1600×1200 (which is 1.9 Mpx), this means de-facto unlimited storage for most users.

My new Google Nexus S on Softbank Mobile

I just got myself a Google Nexus S / Samsung Nexus S with Android 2.3.6 (Gingerbread). Several of the applications I had wanted to run on my previous smartphone (Google Ion a.k.a. HTC Magic, Android 1.6) were only available for Android 2.1 or later. I would have had to reflash the phone with something like CyanoGenMod to get a newer version, since Google did not make any updates available for the old hardware.

The new phone’s screen is great. The WXVGA resolution of 800×480 (“Wide eXtended VGA”) provides much more usable space than the HVGA 480×320 (“Half size VGA”) of the Google Ion or the iPhone 3GS for that matter, though it is a little less than the 960×480 of the current iPhone 4. Talking of which, the Samsung is only a few millimetres wider and taller but also a little lighter than the Apple product.

There are several versions of the Nexus S. Some have the AMOLED screen, others the S-LCD. I picked the AMOLED version (GT-I9020A) which was about $15 more expensive but has better image quality than the S-LCD version (GT-I9023).

Setup was very easy, once I figured out how to pull off the back cover to get access to the battery and SIM slots (there was no paper owner’s manual, which instead you have to download as a PDF).

I simply moved the Softbank Mobile SIM from my HTC to my Samsung, put back the battery and switched it on. Voila, it was working on the Softbank network, and I was immediately able to send and receive SMS, unlike the HTC where I manually had to enter parameters for an access point that I had to Google in a thread in some online forum. The downside of the effort to make things work smoothly for most customers was that using a Softbank SIM also changes the language to Japanese. Sure, most Softbank customers are native Japanese-speakers and they will be helped by switching language, it wasn’t what I wanted. Luckily I could manually switch it back.

The GPS of the Samsung is much better than in the HTC, which could not get a location if I was inside my house and wanted to get directions before heading out for a train or bike ride. The Nexus GPS gets the position quickly and much more accurately. With the Ion, when I was manoeuvring the charming back streets of Shimokitazawa (which consists mostly of two story houses, no big skyscrapers to block satellites), not only might it put me two blocks away from where I was, it would not even get the directions right when I was trying to figure out which way was North and South. It worked OK only with lots of open space, such as when cycling along big roads and in the countryside.

One very neat touch is that the Gallery application where you view your camera shots is integrated with Google Picasa, which I use for hosting all pictures from my main camera, a Canon S95. So it doesn’t matter if I’ve taken a shot with the Samsung or with the Canon, it’s always there to show someone when I want to.

I’m still discovering new features and will update the blog as I go along.

More information:

UPDATE 2011-09-10:

I did still have to manually set up an APN for Softbank after all, because with the defaults, even though I could send and receive phone calls and SMS, I could not access the web or use Gmail or Google Maps unless I was on a WLAN. Here is what is required:

Go to: Settings > Wireless & networks > Mobile networks > Access Point names. The initial list was empty. Push the menu button and select New APN. Set the following parameters (leave all settings not mentioned at their initial value):

Name:Open Softbank
APN: open.softbank.ne.jp
Port: 8080
Username:opensoftbank
Password:ebMNuX1FIHg9d3DA
MCC: 440
MNC: 20
APN type: default

After that I could step outside and walk to the end of the road (out of reach of my WLAN) and still browse the web or use Google Maps. The “3G” marker will illuminate in the status bar at the top. Make sure you have the Smartphone data plan from Softbank to limit your data charges, and to have data roaming disabled so other provider networks don’t get used for (non-flat rate) data if you’re out of reach of Softbank.