About Joe Wein

Software developer and anti-spam activist

Report sub4sub.com spam

After uploading a video clip of mine to YouTube for public viewing, I received the following message via YouTube:

Gracehapp has sent you a message:

whats going on? great video
To:[my YouTube ID and 19 others]

howdy,

wow i like ur channel im gonna sub to ya..if you want more subs i used a website

called sub4sub.com you can enter everyday im after getting 300 subs since yesterday.

keep the vids coming

If you receive a message like that (even with other domains in place of ‘sub4sub.com’), report it to YouTube as spam. To the right of the YouTube logo at the top of the message you will see:

help center | e-mail options | report spam

click on that “report spam” link.

It looks like the same spammers previously used the domain earnsubscribers.com, which was advertised using identically worded messages.

Google Photos links to Google+ Photos instead of Picasa

I am a Google Picasa user who earlier this year also joined the Google+ social network. I use Google Picasa to share photographs and videos with friends and family. Google+ makes it easy to share pictures and albums with specific selected circles of friends.

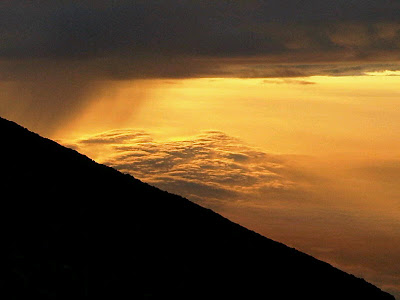
Morning light on Mount Fuji

Until recently, I could conveniently launch the Picasa Web Albums site by clicking “Photos” in the Google navigation bar at the top of, for example, Gmail. A few days ago this changed and the link now takes me to the Google+ photo viewer. For me the new behaviour is inconvenient, because there are many things I can do with my albums in Picasa Web Albums that I can’t do from the Google+ photo viewer (which is really just meant for viewing and little else).

If you’re missing the Google link to Picasa, the simple workaround for now is to bookmark this URL:

https://picasaweb.google.com/home

and use it whenever you want to invoke Picasa Web Albums. Apparently, Google is working on integrating the oogle+ photo viewer with Picasa Web Albums more closely, so eventually the Picasa functionality will become available under “Google Photos” again.

On the positive side, it appears that the integration between Google+ and Picasa Web Albums has practically eliminated storage limitations for Picasa users. Facebook already offered unlimited picture uploads as long as each album set was limited to 200 pictures. With Picasa and Plus, only pictures above 4 Mpx or videos above 15 minutes count towards the limit. As Picasa by default resizes all uploaded pictures to 1600×1200 (which is 1.9 Mpx), this means de-facto unlimited storage for most users.

My new Google Nexus S on Softbank Mobile

I just got myself a Google Nexus S / Samsung Nexus S with Android 2.3.6 (Gingerbread). Several of the applications I had wanted to run on my previous smartphone (Google Ion a.k.a. HTC Magic, Android 1.6) were only available for Android 2.1 or later. I would have had to reflash the phone with something like CyanoGenMod to get a newer version, since Google did not make any updates available for the old hardware.

The new phone’s screen is great. The WXVGA resolution of 800×480 (“Wide eXtended VGA”) provides much more usable space than the HVGA 480×320 (“Half size VGA”) of the Google Ion or the iPhone 3GS for that matter, though it is a little less than the 960×480 of the current iPhone 4. Talking of which, the Samsung is only a few millimetres wider and taller but also a little lighter than the Apple product.

There are several versions of the Nexus S. Some have the AMOLED screen, others the S-LCD. I picked the AMOLED version (GT-I9020A) which was about $15 more expensive but has better image quality than the S-LCD version (GT-I9023).

Setup was very easy, once I figured out how to pull off the back cover to get access to the battery and SIM slots (there was no paper owner’s manual, which instead you have to download as a PDF).

I simply moved the Softbank Mobile SIM from my HTC to my Samsung, put back the battery and switched it on. Voila, it was working on the Softbank network, and I was immediately able to send and receive SMS, unlike the HTC where I manually had to enter parameters for an access point that I had to Google in a thread in some online forum. The downside of the effort to make things work smoothly for most customers was that using a Softbank SIM also changes the language to Japanese. Sure, most Softbank customers are native Japanese-speakers and they will be helped by switching language, it wasn’t what I wanted. Luckily I could manually switch it back.

The GPS of the Samsung is much better than in the HTC, which could not get a location if I was inside my house and wanted to get directions before heading out for a train or bike ride. The Nexus GPS gets the position quickly and much more accurately. With the Ion, when I was manoeuvring the charming back streets of Shimokitazawa (which consists mostly of two story houses, no big skyscrapers to block satellites), not only might it put me two blocks away from where I was, it would not even get the directions right when I was trying to figure out which way was North and South. It worked OK only with lots of open space, such as when cycling along big roads and in the countryside.

One very neat touch is that the Gallery application where you view your camera shots is integrated with Google Picasa, which I use for hosting all pictures from my main camera, a Canon S95. So it doesn’t matter if I’ve taken a shot with the Samsung or with the Canon, it’s always there to show someone when I want to.

I’m still discovering new features and will update the blog as I go along.

More information:

UPDATE 2011-09-10:

I did still have to manually set up an APN for Softbank after all, because with the defaults, even though I could send and receive phone calls and SMS, I could not access the web or use Gmail or Google Maps unless I was on a WLAN. Here is what is required:

Go to: Settings > Wireless & networks > Mobile networks > Access Point names. The initial list was empty. Push the menu button and select New APN. Set the following parameters (leave all settings not mentioned at their initial value):

Name:Open Softbank
APN: open.softbank.ne.jp
Port: 8080
Username:opensoftbank
Password:ebMNuX1FIHg9d3DA
MCC: 440
MNC: 20
APN type: default

After that I could step outside and walk to the end of the road (out of reach of my WLAN) and still browse the web or use Google Maps. The “3G” marker will illuminate in the status bar at the top. Make sure you have the Smartphone data plan from Softbank to limit your data charges, and to have data roaming disabled so other provider networks don’t get used for (non-flat rate) data if you’re out of reach of Softbank.

strcpy data corruption on Core i7 with Linux 64bit

If you’re C programmer, does this code look OK to you?

#include <stdio.h>
#include <stdlib.h>
#include <string.h>

int main(int argc, char* argv[])
{
  char szBuffer[80];
  strcpy(szBuffer, "abcdefghijklmnopqrstuvwxyz");
  printf("Before: %s\n", szBuffer);
  strcpy(szBuffer, szBuffer+2);
  printf(" After: **%s\n", szBuffer);

  return 0;
}

Here is the output on my server, a Core i7 running Debian 6:

Before: abcdefghijklmnopqrstuvwxyz
After: **cdefghijklmnopqrstuvwzyz

What the program does is dropping two characters from a text string in a buffer, moving the rest of it left by two characters. You expect the moved characters to stay in sequence, but if you compare the last three characters of the output you see that that isn’t the case. The ‘x’ has been obliterated by a duplicate ‘z’. The code is broken.

It’s a bug, and not a straightforward one, as I’ll explain.

I first came across it a couple of months ago, as I was moving some code of mine from an Athlon 64 Linux server to a new Intel Core i7 server. Subsequently I observed strange corruption in data it produced. I tracked it down to strcpy() calls that looked perfectly innocent to me, but when I recoded them as in-line loops doing the same job the bug went away.

Yesterday I came across the same problem on a CentOS 6 server (also a Core i7, x86_64) and figured out what the problem really was.

Most C programmers are aware that overlapping block moves using strcpy or memcpy can cause problems, but assume they’re OK as long as the destination lies outside (e.g. below) the source block. If you read the small print in the strcpy documentation, it warns that results for overlapping moves are unpredicable, but most of us don’t take that at face value and think we’ll get away with it as long as we observe the above caveat.

That is no longer the case with the current version of the GNU C compiler on 64-bit Linux and the latest CPUs. The current strcpy implementation uses super-fast SSE block operation that only reliably work as expected if the source and destination don’t overlap at all. Depending on alignment and block length they may still work in some cases, but you can’t rely on it any more. The same caveat theoretically applies to memcpy (which is subject to the same warnings and technically very similar), though I haven’t observed the problem with it yet.

If you do need to remove characters from the middle of a NUL terminated char array, instead of strcpy use your own function based on the memmove and strlen library functions, for example something like this:

void myStrCpy(char* d, const char* s)
{
  memmove(d, s, strlen(s)+1);
}
...
  char szBuffer[80];
...
  // remove n characters i characters into the buffer:
  myStrCpy(szBuffer+i, szBuffer+i+n);

I don’t know how much existing code the “optimzed” strcpy library function broke in the name of performance, but I imagine there are many programmers out there that got caught by it like I was.

See also:

Solar energy, USA vs. Germany

Recently I came across an article that quoted a Forbes commentary (“Sue OPEC? Congress Should Sue Itself”, 2008-07-09) comparing solar energy development in the USA (or lack thereof) with the situation Germany, where 2010 was a veritable boom year for photo-voltaic panels.

Two maps and one quote underneath caught my attention:

Check out the map above. With the exception of Seattle, the entire continental U.S. is much sunnier than Germany. Yet Germany has 17 times the installed solar base per capita.

According to the map, Germany received amounts of sunlight comparable to the region around notoriously cloudy Seattle and arctic Alaska, while most of the states along the Canadian border got 50% more sun than the Southern half of Germany.

This did not seem plausible to me. While it’s true that most of Germany lies further North than the 49th parallel that marks most of the US-Canadian border and should therefore receive less sun than most of the US, most of Germany’s climate is far sunnier than Seattle, which lies about as far North as Mannheim or Nuremberg (Nürnberg) in Southern Germany. Based on latitudes and annual rainfall, solar insolation (the amount of solar energy radiated onto a given area) should be largely comparable between at least southern Germany and the northern US outside the Pacific Northwest. I’ll give you some data to verify this theory.

Here is a map of insolation for the entire US, showing kWh per square metre per day at latitude tilt (multiply by 365 for annual figures like in the Forbes map):

As you can see, most of the US gets between 4 and 5.5 kWh/day (yellow-grey to dark yellow), or 1450-2000 kWh per year.

And here is a map of insolation in Germany, showing horizontal irradiation in kWh per square metre per year:

Note that the colour scale is not the same. The southern part of Germany gets 1200 kWh and more per year, the northern part less than that.

But that’s not the whole picture. If you you paid attention, you noticed the “at latitude tilt” (US) versus “horizontal irradiation” (Germany). It makes a big difference, because without taking it into account, the comparison of the raw numbers become an apples to oranges comparison: The numbers in both maps don’t actually measure the same thing!

The further you move north, the lower the sun stands at midday to the South. Consequently, when you install solar panels anywhere but in a tropical country, you don’t install them horizontally but make sure to tilt them at the right angle to catch the most sun per square metre of expensive panel, based on the average position of the sun at noon throughout the year, which depends on your distance from the equator. It will be more tilted at a more northern location than somewhere further south.

The US solar data is measured per square metre of panel. The German data however is per square metre of shadow the panels cast on the ground, which is not the same. The two ways of measuring insolation only match at the equator.

Let’s look at an example: In Chicago, at around 42 degrees North, a solar panel tilted 42 degrees towards south is exposed to 37% more sun than a flat piece of lawn of the same size (1/cos(42 degrees) = 1.37). So a one square metre panel’s 1500 kWh/year in total solar irradiation in Chicago is basically the same as 1100 kWh of horizontal exposure, which is the same or less than you catch just about anywhere in Germany. Far from being comparable only to rain-swept Seattle, Germany’s annual exposure to the sun is actually not too different from the US east of the Mississippi, except for the Southern sunbelt from Texas to Florida, which does get more sun.

So what do we learn from this?

1) As our physics teacher always used to tell us: Watch your units! Numbers don’t tell you anything unless they go with the proper unit.

2) The German solar subsidy program is no crazy boondoggle at taxpayer’s expenses. Solar energy does make sense in Germany, as it does in most other countries in temperate climates.

Of course it makes even more sense in dry climates like Spain, Turkey, North Africa and the arid US Southwest, where it’s ideal. On the other hand, Seattle or Iceland may not be the greatest places for it.

Ideally, solar energy investment should start where it brings the highest returns, accompanied by sufficient investment into a power grid that can carry power wherever it’s needed.

In 2010, Germany produced about 1.9% of its electricity usage from solar panels, almost double what it was the year before. By 2020 this is expected to more than triple again, to 40 GWh or 6%. As mass production brings costs down while oil prices keep going up, German solar electricity is expected to become cost-competitive with conventional power by about 2015, which will be great for cutting dependence on dwindling oil reserves.

Also, let’s not forget that solar energy is not the only renewable game in town: Wind for electric power is already much more competitive on a cost per kWh basis than photovoltaics and deserves more attention. Many regions that have relatively poor solar prospects have excellent wind opportunities, for example Scotland. A mix of solar and wind often works better than just one or the other.

Germany has great potential for wind power, both land based and off-shore, and so do the US. What is holding wind power back particularly in the US (but to some extent also in Germany), is an under-sized grid that can not move enough power over the necessary distances from areas with plentiful wind to where the power is needed. Investment in a 21st century power grid will be essential for a low-carbon future.

Bike Friday Pocket Rocket

Yesterday I ordered a new bicycle, a Bike Friday Pocket Rocket. It’s a folding bike that rides like a good road bike.

My house in Setagaya, Tokyo is tiny and the three other members of the family already own four bikes between them, so we’re really short of space.

A while ago an Alex Moulton bike in a park in Tokyo caught my eye and that started me looking at small-wheeled fast bikes.

Moulton bikes have suspensions and use small wheels (20 inch or smaller). Some of them use a space frame, like on the TSR model pictured above and can be separated into two halves for transport or storage. Unfortunately, some Moultons are obscenely expensive (for the list price of the top of the range Moulton Double Pylon — JPY 1,795,500 — you could almost get a Honda Insight hybrid car). A Moulton TSR-30, the model I would have been most interested in, sells for JPY 390,000 (about US$5,000) over here, which is way over my budget limit.

Therefore I started looking at various other small-wheeled bikes, including Dahon, Birdy (Riese & Müller, Germany) and Bike Friday (Oregon, US).

I then test rode a Bike Friday Pocket Rocket at Amanda Sports (one of their dealers in Japan) here in Tokyo last summer and liked it. Bike Friday bikes are definitely not cheap either, but the bikes are well designed and well made and carry a life-time warranty on the frame. The company is famous for its customer service. They use a lot of standard parts to make sure their bikes are easy to repair and in all the bike forums I visited, I never read a single bad word about them from any of their owners: Their customers seem very loyal.

I probably would have ordered a Bike Friday this spring, but then the M9.0 Tōhoku earthquake and tsunami hit Japan and triggered the Fukushima nuclear disaster, prompting me to take my family abroad until the situation in Japan had stabilized again a bit. I returned and now I finally placed the order.

With the help of one of Bike Friday’s bicycle consultants, I selected a 27-speed model using Shimano STI integrated shifters, with drop handles, narrow high pressure tires, fenders and a kick stand, in a colour called “Enno Orange”.

The bike will be delivered in early October. Stay tuned for pictures and ride reports with even more pictures!

Cycling since high school

Though born and raised in Germany, I’ve never been interested in football (soccer) or anything that involves a ball or opposing teams. The only sports I really enjoyed were swimming, walking or running longer distances and cycling. These are sports that you can do not only when you’re young, but throughout your life.

When I was in high school I bought my first 10-speed bicycle, a French Motobecane with drop handles. During one summer I did 7,500 km (4700 miles) over a period of 150 days (50 km/day average). I enjoyed going for rides of several hours, especially on weekends. My longest single day distance was 220 km.

Eleven years ago, when I moved to Yokohama, I bought a mountain bike. I gave it away to friend when I moved to my small house in Tokyo last year, because I had no space for it. Since then I’ve been using either my wife’s mamachari (housewife’s bike) or a small rusty foldable with squeaky brakes that we originally got as freebie from SoftBank Mobile when we signed up for iPhone contracts (seen folded in the centre of the picture of my home at the top). I am not a bike snob. I’ll ride just about anything with two wheels and usually the only kind of bicycle wear I put on is a proper bicycle helmet.

In Tokyo, a bicycle will often get you from A to B almost as quickly as a car (sometimes quicker) and you won’t be paying an arm and a leg for parking, plus it’s more fun than driving a car on our notoriously congested city roads. That’s why I do most of my shopping by bicycle these days.

I survived Mount Fuji

In Japan there’s a saying that you’re a fool if you never climb Mt Fuji and that you’re also a fool if you climb it more than once. As an old admirer of Mt Fuji who has just climbed it for the first time, I can now also understand the second half of the saying. I thought I was reasonably fit, but hiking up there with my level of training was one of the most foolish things I have ever done. Never before in my live had I felt so exhausted as during the last kilometers on the way down to the bus stop at the Subashiri 5th stage.

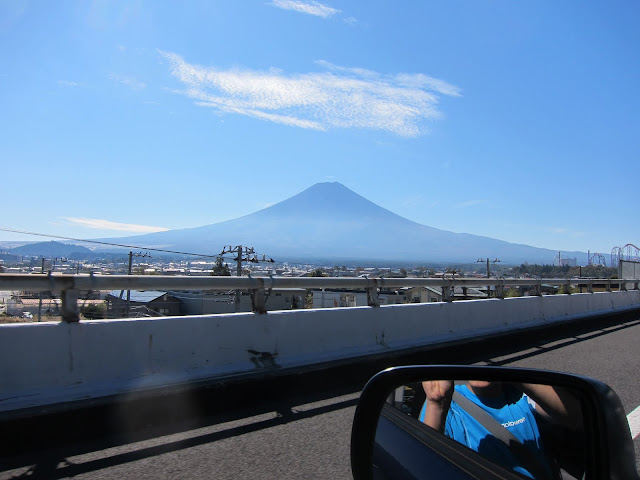
Since first coming to Japan as a visitor more than two decades ago, I have always loved the majestic views that Mt. Fuji offers, especially how its often snow-capped cone shape pops up unexpected, often from far away. Its views are particularly clear during the dry winter season. The furthest I’ve seen it from was from a bus on the expressway near Narita airport, about 160 km east of the mountain. My favourite views are from around Izu peninsula in Shizuoka. I’d been up on the 5th stage several time, the highest you go by car or bus (or bicycle).

My friend Tom did a double traversal of the Grand Canyon (South rim – bottom – North Rim – bottom – South rim) with several friends on his 40th birthday and climbed Mount Kilimanjaro (5895m) the year he turned 50. That impressed me so much that I promised myself I would climb Mt Fuji the summer of the year I turned 40. That didn’t happen. But 10 years later I was determined to make it up there as a 50 year old. Last weekend I finally did it.

My preparation included one hike of a few hours with my family along the coast near Izu Kogen and a 2 hour hike up a mountain in Saitama prefecture with my son, es well as some bike rides for general fitness. It was nowhere near enough. My legs were not used to descending much and my maximum distance was far too short. It was like trying to run a marathon after only ever having run a maximum of 5 km.

I wore my hiking boots and dressed in enough layers appropriate for temperatures a little above freezing. Temperatures at the peak are roughly 20C (36F) lower than at sea level. I brought a wool cap, gloves and a headlamp for nighttime hiking. I took food and a several liters of water in my backpack. I probably would have managed with 2 liters, but took more, which ended up being on the heavy side.

We took a highway bus from Tokyo Shinjuku to Gotemba and from there shared a cab to the Fujinomiya 5th stage on the south side of the mountain. We had breakfast there and put on our rain gear, taking our time to give the body a chance to acclimatize a bit to the altude (~2400m / 8000 ft = 24% less oxygen). The hike up to the 9th stage mountain hut was mostly in fog and drizzle, unfortunately. As you climb up higher, the vegetation gets more and more sparse until it feels like you’re on another planet. Some of the volcanic rock is very colourful.

Along the trail from the 5th stage parking lot to the peak there are four mountain huts, the 6th trough 9th stages (roku-go-me through kyu-go-me in Japanese). They provide food, toilets and accommodations during the climbing season. Most seem to run diesel generators to generate their own power, as they are not connected to the grid. If you’re an NTT docomo customer you can also get mobile reception there.

We had reservations at the 9th stage hut, which is one of the largest, but this being the last weekend of the annual climbing season, as many hikers as possible were crammed into the tiny rooms. We were seven guys in one 5 m2 (54 sqft) room (1.8 m by 2.7 m / 6 ft by 9 ft, three tatami mat size). A small light bulb stayed on all night and there were people snoring loudly all over. The rooms were on two levels, with ladders to the top ones, all separated from the corridor by a curtain. The air at 3460m above sea level already has 34% less oxygen, but the large number of hikers in a small space must have dropped it even further, resulting all of our group having headaches, a symptom of altitude sickness.

It is very common for Fuji hikers to carry oxygen cans (5l for about 500 yen) to inhale when they feel weak. Like many gaijin (foreigners) I first laughed about this, but when not feeling well I gave it a try. I can’t say it really made that much difference for me. I think the act of stopping to get out the can, fit the inhaler, take a couple of breaths and stash it away again provided as much rest that it was hard to tell if one feels better because of the rest or because of the short term oxygen boost. Himalaya climbers on oxygen breathe it for extended periods, so its effects are not really comparable.

There were people hiking past the hut all night. You could see a line of what looked like fireflies in the distance slowly moving up the huge dark cone of the mountain towards us, and up above us, towards the peak. In the afternoon the sky had cleared up and we could enjoy the views of clouds below us, like from an airplane. At night the sky was full of stars, like in my village at home but unlike the big cities in Japan, where the glare of street lights all but obscures the nighttime sky and where people never see the Milky Way.

The mountain hut gradually got busy after midnight, as hikers got ready to set off for the peak to experience the sunrise from the top. Lacking in sleep, we rested longer and left around 5 am, seeing the sunrise to the East from the Southern slope about 1 km from the peak.

The last few hundred meters below the tori (Shinto shrine gate) that marks the entrance to the crater rim were mostly spent waiting in a queue, for hundreds of ascending and descending hikers to pass each other on the narrow trail. As we got closer we could also smell the public toilets. At the top there was the shrine and next to it Japan’s highest Post office for sending cards with a Mt Fuji post mark to your friends.

By the time we were at the peak, I had pretty much run out of gas, probably not helped by the lack of sleep under cramped conditions the night before. The hike around the crater rim, up to the weather station located on the highest point (3776m / 12388 ft) and over to the opposite side was difficult already.The crater was very deep and huge. You saw many layers of rock exposed and could only marvel at the force of the explosions that dug it into the top of the mountain. Both inside the crater and at some spots along the slope outside we still found white snow in August.

Our return route was via the Subashiri trail, which is famous for very loose sandy slopes that some people find convenient for sliding down almost like skiing, supposedly making it a very fast return route. For me this was the hardest part of the trip, already lacking the muscle strength to have the kind of control to master sliding. I ended up walking most of it, with the effect of hardly being able to walk down any stairs when I got home. I recovered after three days.

The 5th stage on the Subashiri trail lies lower (about 2000m) than the other trails. The last part of the trail is through forest. That makes it more interesting to hike when you ascend there. It’s less steep but longer than other trails.

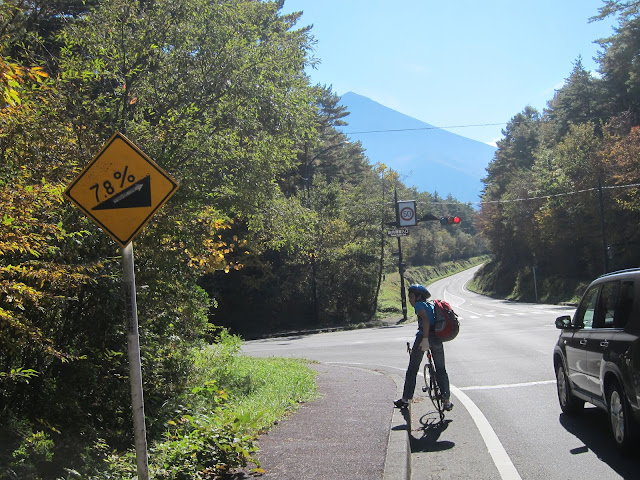
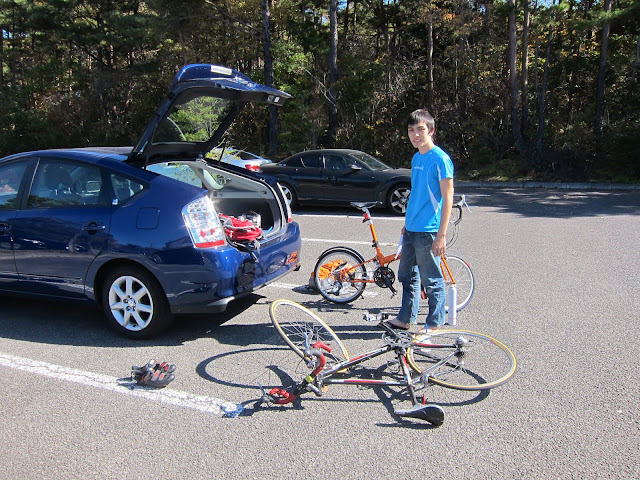
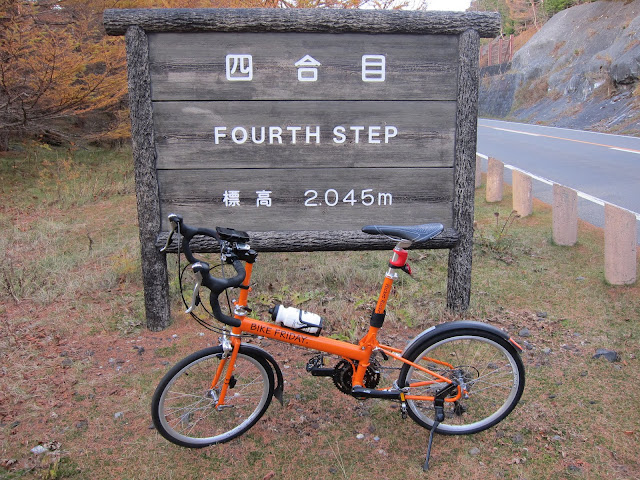
Call me a fool (as per the Japanese saying I quoted at the start), but I definitely want to go back to Mt Fuji next year. I want to climb it again, but with better training upfront and I’ll have nice experiences to add to the strong memories from the first climb. I am also interested into climbing up to the 5th stage by bicycle, as I am just getting myself a Bike Friday Pocket Rocket for trips into the countryside.

Tepco’s unfiltered vent path

On August 13, 2011 I wrote about TEPCO not adding filters to their reactors even decades after Sweden did. Since the, on August 16, 2011, Tepco defended not having any kind of filters in the so-called “hardended vent” path between the containment and the exhaust stack:

Corrections and Clarification of a news report program, “ETV Special” by NHK, broadcasted on August 14

August 16, 2011
Tokyo Electric Power Company
NHK TV program regarding Fukushima Daiichi Nuclear Power Station reported contents that are incorrect and could cause misunderstandings. We hereby provide facts below.
(…)
3. Claim on the PCV ventilation has no filtration
In the program, it was mentioned several times that there were no filters in the primary containment vessel ventilation line. However, boiling water reactors that we operate use “wetwell vent”, which has scrubbing effect to mitigate emission of radioactive materials at the comparative level to the filters. That is to say, in principle, our venting procedure uses the water in the suppression chamber as filteration and we have prepared and added the necessary equipment and procedures for accident management measures.

Tepco’s reactors have a “Standby Gas Treatment System” for filtering gases released into the atmosphere. This system is claimed to be at least 97% effective in unit 1 and at lest 99.9% effective in units 2 and 3. However, it can’t be used for venting high pressure gas from the drywell or wetwell (the containment) in emergencies. In the above press release Tepco defends its decision by claiming that the water pool in the suppression chamber (wetwell) is as effective as some other kind of filter system that it could have had installed when adding the hardended vent path in 1999-2001.

This claim is disingenuous. The FILTRA system installed at the Swedish Barsebäck nuclear power station was in addition to any filtration provided by the wetwell pool, not in place of it. Barsebäck had boiling water reactors like in Fukushima (the plant has since been decommissioned).

Furthermore, it’s not clear how effective the filter effect of the wetwell on its own really is. A US report from 1988 entitled “Filtered venting considerations in the United States” writes:

Within the United States, the only commercial reactors approved to vent during severe accidents are boiling water reactors having water suppression pools. The pool serves to scrub and retain radionuclides. The degree of effectiveness has generated some debate within the technical comnunity. The decontaminatlon factor (DF) associated with suppression pool scrubbing can range anywhere from one (no scrubbing) to well over 1000 (99.9 % effective). This wide band is a function of the accident scenario and composition of the fission products, the pathway to the pool (through spargers, downcomers, etc.), and the conditions in the pool itself. Conservative DF values of five for scrubbing in MARK I suppression pools, and 10 for MARK II and MARK III suppression pools have recently been proposed for licensing review purposes. These factors, of course, exclude considerations of noble gases, which would not be retained in the pool.

The decontamination factor of 5 for the Mark I containment (as used in units 1 through 5 of Fukushima Daiichi) means that 80% of the radioactive substances (excluding noble gases) is retained, while 20% is released. The FILTRA system installed at 10 Swedish nuclear power plants and one in Switzerland is designed to ensure that in a severe accident 99.9% of core inventory is retained in the containment or the filters. The difference between releasing up to 20% versus 0.1% is huge, it means up to 200 times more radioactivity is released in the system defended by Tepco versus the enhanced system used in Europe and commercially available worldwide.

Fukushima: Keep out indefinitely

The government of Japanese prime minister Kan is finally telling evacuees from within the 20 km exclusion zone around the wrecked Fukushima-I nuclear power plant that they won’t be able to return any time soon.

For months the official line had been that residents could not return until the reactors had achieved “cold shutdown”, which normally means that the chain reaction had stopped and the decay heat in the core had subsided enough for the coolant to be below 100 degrees C (below boiling point). This line ignores the fact that three of the reactors no longer have a cooling system in the usual sense and more importantly, that the area around the power station was severely contaminated by radioactive fallout from the broken reactors.

That reality has finally been accepted, explains the New York Times:

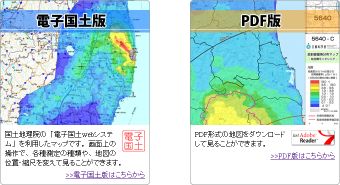
The government was apparently forced to alter its plans after the survey by the Ministry of Science and Education, released over the weekend, which showed even higher than expected radiation levels within the 12-mile evacuation zone around the plant. The most heavily contaminated spot was in the town of Okuma about two miles southwest of the plant, where someone living for a year would be exposed to 508.1 millisieverts of radiation — far above the level of 20 millisieverts per year that the government considers safe.

The survey found radiation above the safe level at three dozen spots up to 12 miles from the plant. That has called into question how many residents will actually be able to return to their homes even after the plant is stabilized.

Many of the evacuees had been led to believe that most of them might be able to return to their homes some time after the turn of the year, based on Tepco’s promises of establishing some sort of a cooling system and generally stabilizing the situation at the plant. Probably over 100,000 people will have to rebuild their lives from scratch elsewhere now, with no prospect of returning for decades, just like in the exclusion zone in Ukraine and Belarus near the Chernobyl plant, that has been off-limits for over a quarter of a century already. Besides a semicircle of 20 km radius around Fukushima-I there is also a strip of land to the North West, towards Fukushima City, that includes the village of Iitate mura, which is just as badly contaminated as the vicinity of the reactor itself.

People from the area should have been told much sooner, but presumably the prospect of having to pay compensation played a part in holding off giving people the facts. If somebody other than Kan was prime minister, they may well have waited for another 6 months. Kan will probably step down shortly and frankly I don’t hold much hope for how his successor, whoever he may be, will deal with the situation.

Kan famously took on ministerial bureaucracies and vested interests as health minister before and he tried his best in this situation. Many others would try to avoid confrontation with the nuclear industry, following the path of least resistance instead. Kan’s support ratings are extremely low now, but perhaps his efforts, however imperfect they were, may not be fully appreciated until we have his successors to compare with…

APC Smart-UPS 750 with Ubuntu 11.4


I finally got myself an uninterruptible power supply (UPS). The infamous August heat in Tokyo has been pushing power use including air conditioning close to the limit of what Tepco can supply: All 10 reactors in Fukushima Daiichi and Daini are either destroyed or shut down. In total about 2/3 of the nuclear power capacity in Japan is currently offline. That gave me one more reason to shop for a UPS. The other was that I have a Linux server and Linux file systems tend to use a lot of write buffering, which can make a mess of a hard disk partition if power is lost before the data is fully written to disk.

A friend recommended APC as a brand. Researching which of their ranges was suitable for my server, it appeared that some advanced PC power supplies with Power Factor Correction (PFC) have problems with the consumer level APC models, which output a square wave when in battery power mode. The more business-oriented models output something closer to a sine wave, the shape of power supplied by your utility company. Because of that I went for the APC Smart-UPS range. The server draws less than 50W, so there wasn’t really much point going for the beefiest models. That’s how I picked the APC Smart-UPS 750 with 500W of output power. My exact model is the SUA750JB, the 100 V, 50/60 Hz model for Japan. If you live in North America, Europe, Australia or New Zealand you’ll use either the 120V or 230V models. There’s also a 1000W (1500 VA) model, the APC Smart-UPS 1500, which features a larger capacity battery and larger power output.

The UPS arrived within two days. There’s a safety plug at the back of the unit which when open disconnects the battery for transport, which you’ll have to connect to make it work. The internal lead-acid batteries appeared to come fully charged. They are fully sealed units that are supposed to be leak-proof.

My unit came with a manual in Japanese and English but no software of any kind. It came with a serial cable, which I don’t have any use for, as virtually all modern PCs no longer have legacy serial and parallel ports. What I needed was a USB cable with one type A and one type B connector and that was not included. I am not sure why APC bundles the serial cable and not the USB cable. For an item in this price range, the USB cable should not be extra. However, I had a couple of suitable cables lying around from USB hard disks and flat screen monitors with built-in USB hubs, so it wasn’t a problem. You may want to check if the unit you’re buying comes bundled with the USB cable or if you may need to get one separately.

Once you connect the UPS to the PC using a USB cable, you should be able to verify that Linux has detected the device. Run:

me@ubuntu-pc:~$ lsusb
Bus 003 Device 003: ID 051d:0002 American Power Conversion Uninterruptible Power Supply

The software I’m using for linux is the apcupsd daemon, whose source code is available on SourceForge. I compiled it this way:

./configure --enable-usb
make
sudo make install

To be able to run it you need to set some config files. In /etc/default/apcupsd set

ISCONFIGURED=yes

In /etc/apcupsd/apcupsd.conf:

UPSCABLE usb (default: smart)
UPSTYPE usb (default: apcsmart)
DEVICE (default: /dev/ttyS0)

Stop and start the daemon and you’re in business:

/etc/init.d/apcupsd stop
/etc/init.d/apcupsd start

While the daemon is stopped you can also run apctest to run various tests on the unit.

Test that the UPS works, by pulling the power cable from the wall socket. The UPS should raise an audible alarm and its LEDs should switch from the sine wave symbol to the sine wave with battery poles symbol. Also be aware that UPS batteries do not last forever, especially if they’re used in a hot environment. You may get anywhere between 2 to 4 years of use out of them. Replacement batteries from third parties are usually available for much less than original parts from the UPS manufacturer.