Dekopon, Cherry Blossoms and Some Rain: BRM330 200 Km in West Izu

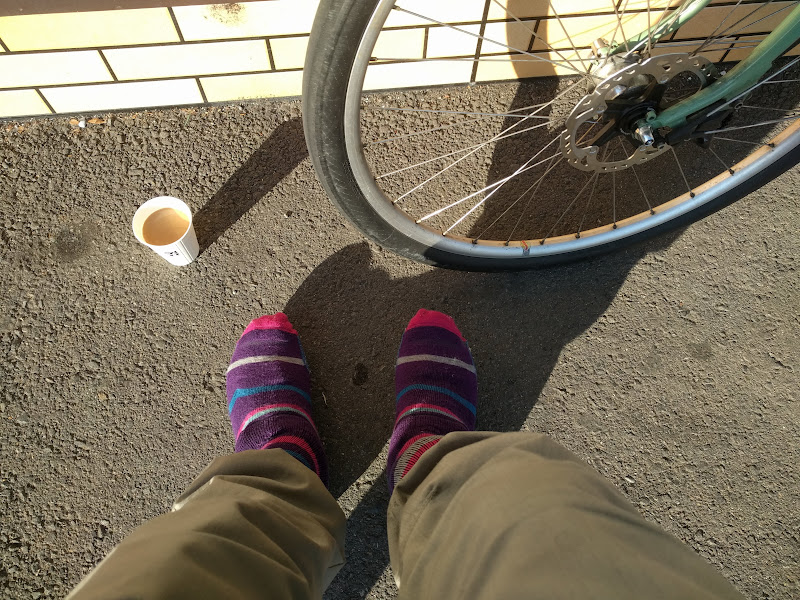
The dekopon season will be coming to an end soon, but to compensate the shorts-and-short-sleeves season has started! I enjoyed both on Saturday, buying local dekopon (4 big juicy ones for 300 yen) in West Izu. The roadside stand worked on the honour principle: I dropped my coins into the collection box and took one bag of fruits.

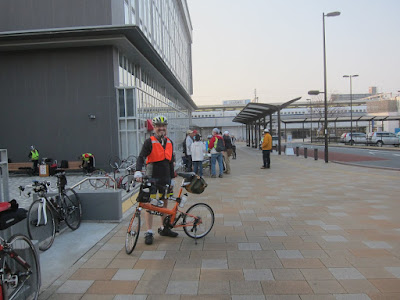
I was the only rider in shorts at the start of the 2019BRM330 200 km brevet in Mishima, out of 13 who had shown up, out of 30 who had signed up, the others having been put off by a weather forecast that predicted a high chance of rain in the evening.

I drove to Mishima on Friday night with the Elephant Bikes NFE in the back of my Prius and parked the car in a coin parking lot (700 yen for 24h). I stayed at the Toyoko Inn, which was also going to be the goal of the 203 km ride which started at Mishima station. There were 2 courses, the hilly Matsuzaki course and the insanely hilly Darumayama course. I had tried and DNFed the latter in 2017, so it was Matsuzaki again for me.

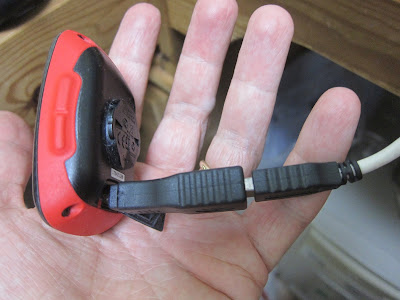
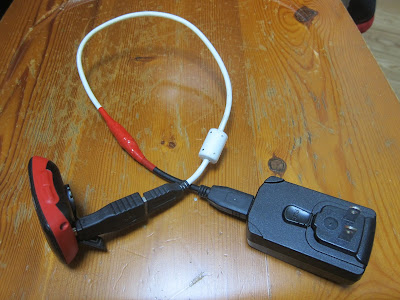
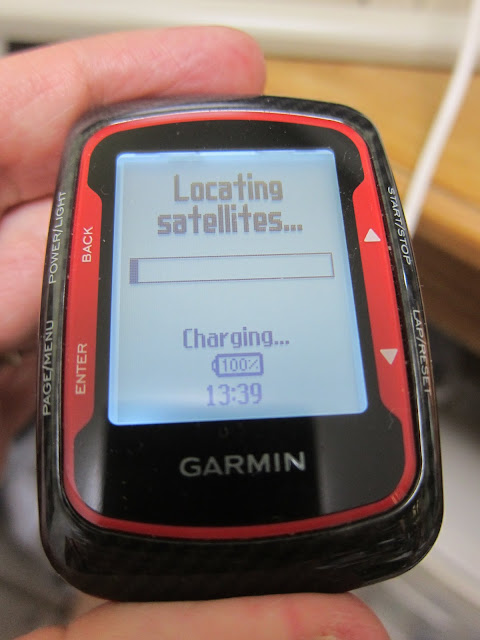
Before the 08:00 start I loaded up the course on my GPS unit, but hit an unexpected snag when it reported a file system error that required a factory reset of the unit, meaning I’d lose my stored breadcrumb trail for navigation that I normally use. So I had little alternative but using my phone and the paper cue sheets for navigation. However, I had not brought my usual plastic cover for the phone to protect it on the handle bars in case of rain, nor had I weather proofed the cue sheets. The map bag of my front bag is not totally waterproof.

I used RWGPS to load the course and map and it gave me verbal directions in English throughout the ride. I kept the phone connected to a 10,000 mAh USB battery in my front bag until the goal. I have two USB batteries and two phones. There’s always a plan B and sometimes a plan C! 🙂

When the rain started to come down on the way back near Toi, I covered the phone with a plastic shower cap from a hotel stay which I secured it with rubber bands. I always keep one shower cap in the front bag as an emergency cover for the leather saddle or whatever. When my wet fingers made the touch screen difficult to operate, I used spare dry socks that I also kept in the same bag to wipe the screen dry again.

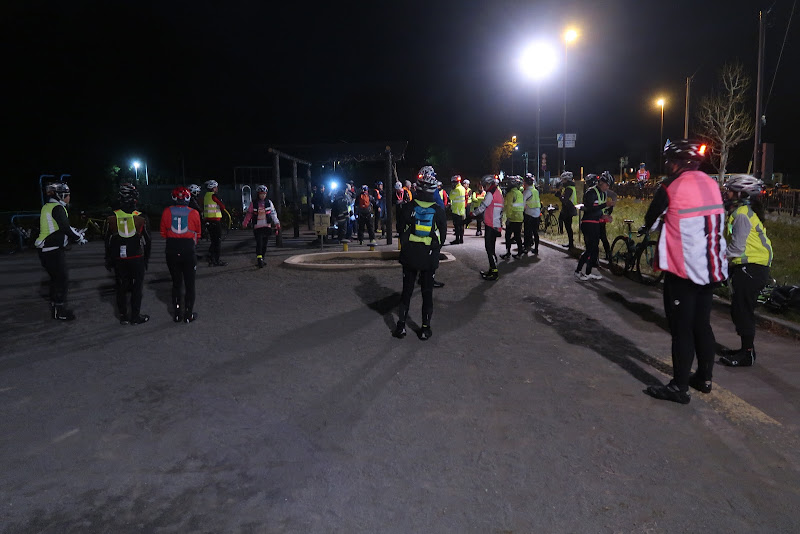
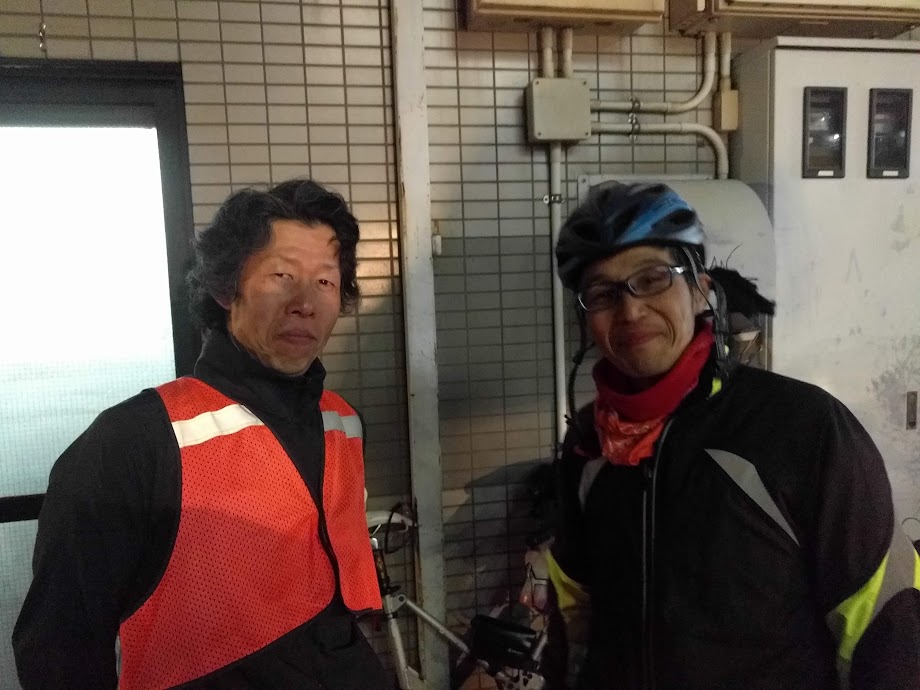
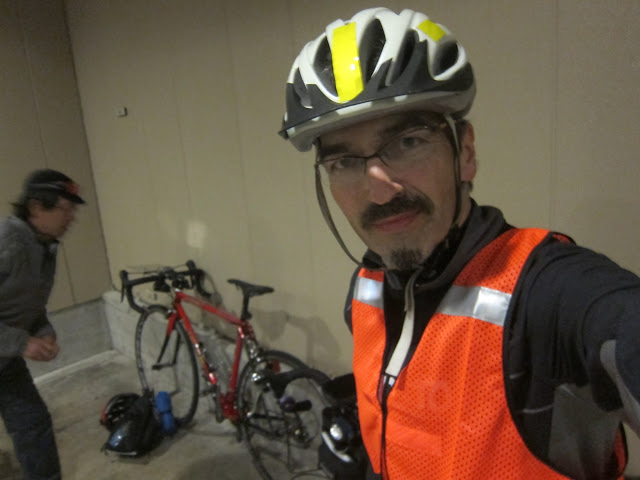
During a brevet on February 10, 2019 organized by Audax Kinki, a participant was sadly hit from behind and killed by a car in a tunnel. Brevet participants are required to wear reflective vests throughout the ride, but sometimes they wear a backpack which could partly obscure the reflective vest. Thus we were asked to wear the vest on top of any backpack. I actually brought two reflective vests, one to wear and one for my light string backpack (for spare clothes) to “wear”, which made getting changed quicker. I had bought the second at a brevet reception when I had forgotten the original one at home.

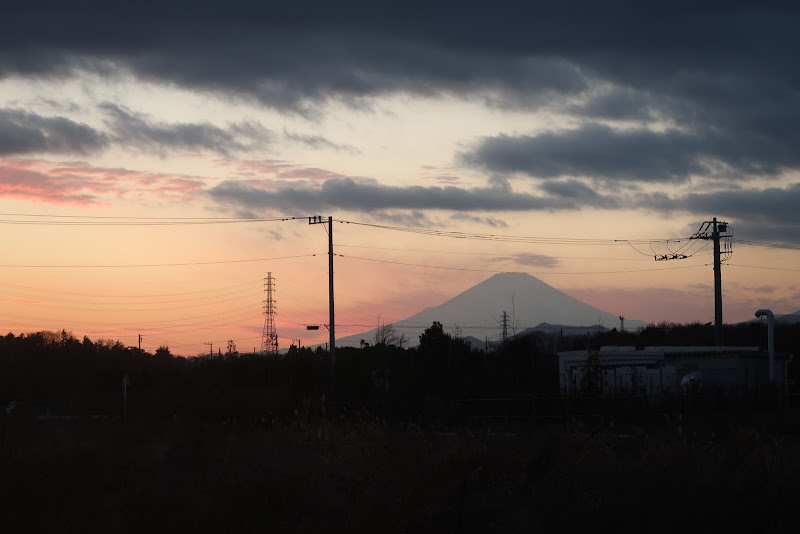
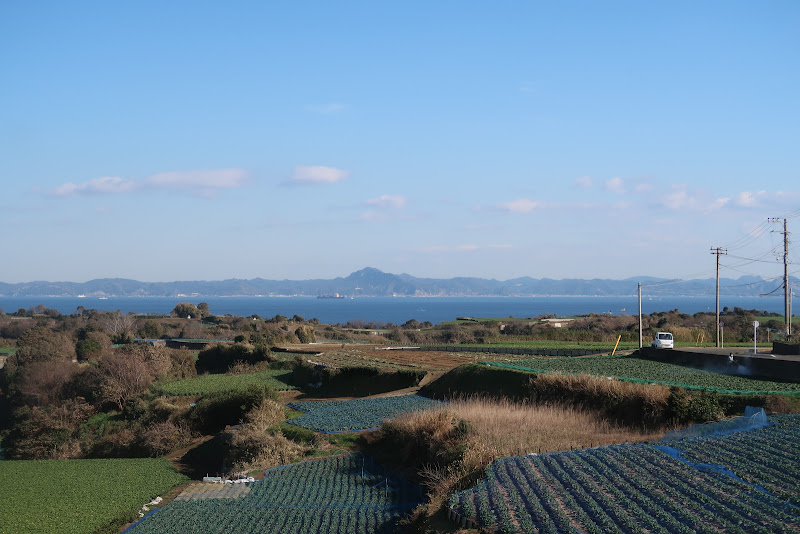
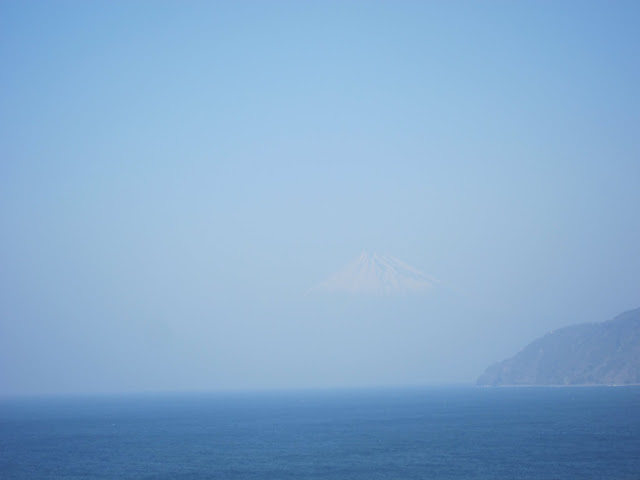
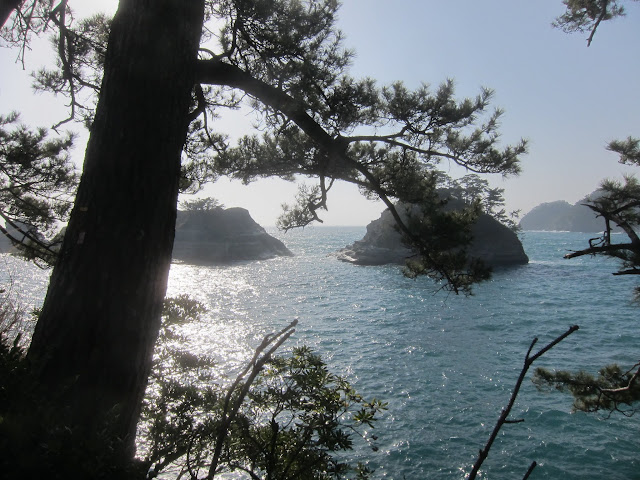
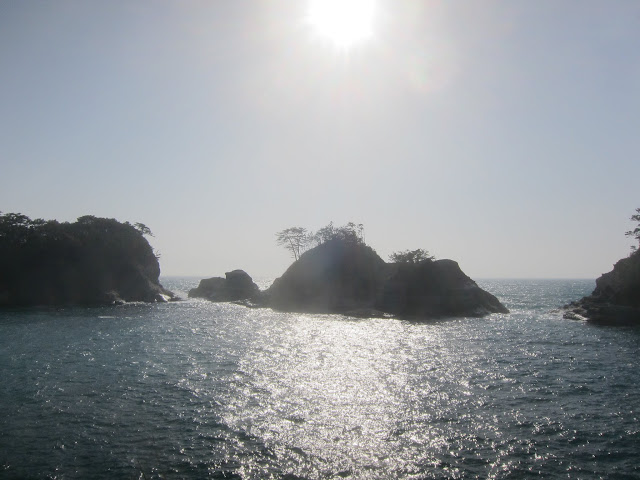
Most of the starter group did not spread out much until we turned the NW corner of Izu and the bigger climbs started. I took some pictures of the others and the scenery, but it was too hazy to see anything of Mt Fuji or even much of the mainland coast of Shizuoka on the other side of the bay. Mt Fuji remained totally hidden for the entire day.

As it got warmer towards noon I started fading a bit. I would have been really uncomfortable in long pants and thermal jacket. I was now riding on my own but comfortable in the knowledge that I was 50 minutes ahead of minimum pace at that point, which should normally ensure that I would complete the ride under the time limit.

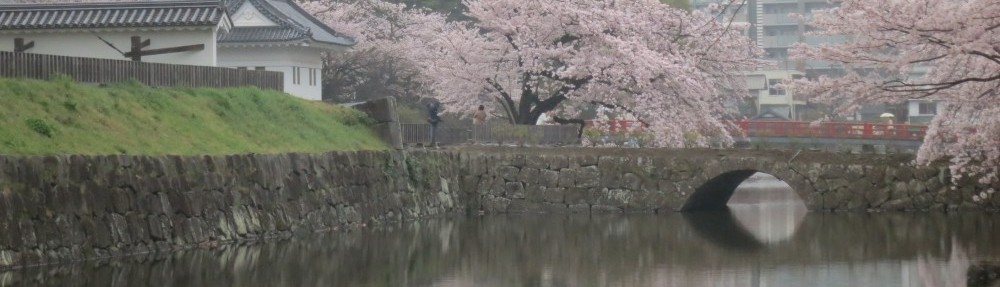
There were a fair number of cherry trees, but most of them weren’t in full bloom yet, many quite sparse at the top still, so I didn’t take too many pictures of them.

There were only two timed controls on this course between the start and the goal, with 161 km in between. Near the southernmost point of the ride there was a photo check: We had to take a picture of a viewing platform on a mountain road together with our brevet card to prove we passed there. I climbed the mountain road together with a young couple. They had already suffered a puncture in NW Izu that had cost them time, while I frequently stopped for pictures.

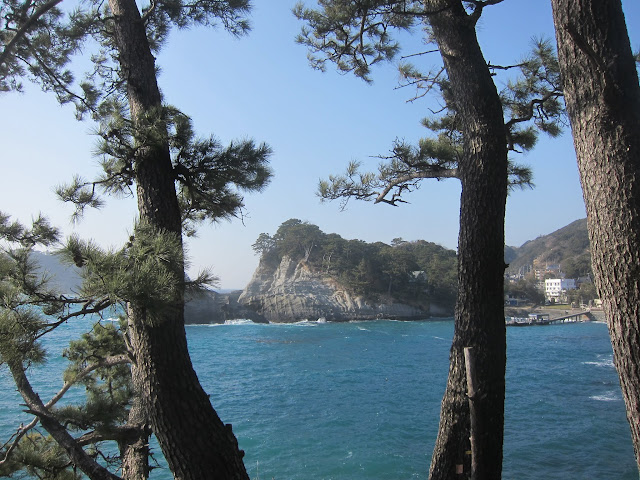
From there I enjoyed a long descent to Kumomi Onsen. I had visited there in December and then climbed Mt Eboshi, which offers a breathtaking scenery of the coast. We passed Iwachi Onsen, where I had often visited by car when our children were still little.

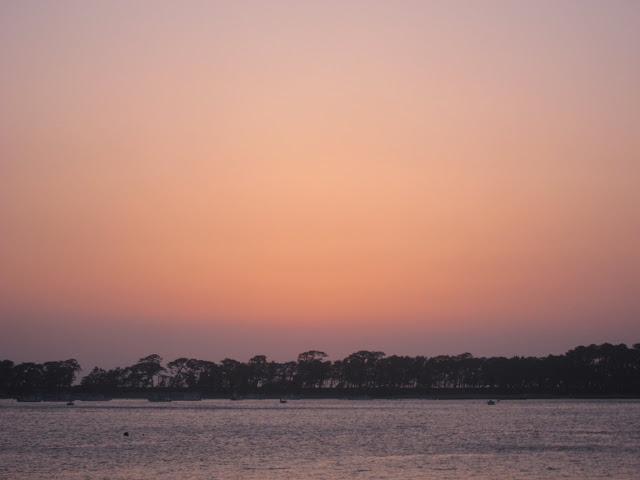
I was trying to make it to near Heda village by sunset, where a staff member was taking pictures of all of us as we passed, but my own pictures took priority. At the last conbini in Toi before the wilderness it started raining and I put on my rain gear. On the descents I had to be a lot more careful. The wet asphalt soaked up all the light.

The rain became quite intense and I couldn’t help thinking of the 17 non-starters who had listened to the weather forecast… but with my time buffer I expected I’d still make it in time, unless I had bad navigation problems in the last 20 km. The phone became difficult to use when its touch screen got wet. Once, the RWGPS app somehow ended up back on the route selection and I had to restart the Navigation, which seemed to have cost me my downloaded maps 🙁 Now I could only use the turn by turn instructions to follow the course, but no map view. Fortunately, those turn by turn instructions worked flawlessly, even if the sound volume wasn’t always high enough to be clearly audible. Worst case I had to check the screen. Twice I went off-course but it soon let me know and it recovered when I backtracked to the wrong turn.

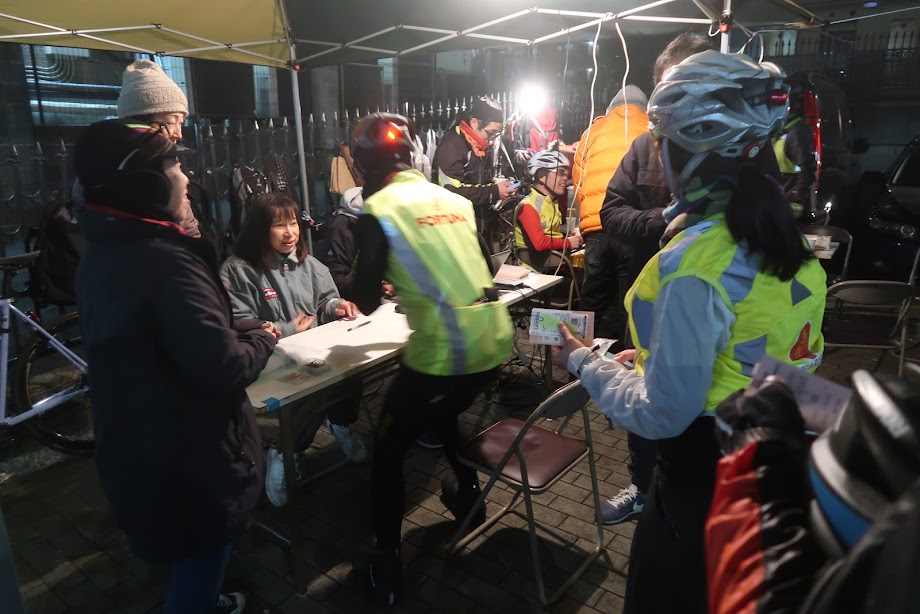
After more than 3 hours of riding in the dark I finally got close to Mishima station. When I stopped at the traffic light across from the Toyoko Inn, a staff member waved at me and handed me a note with the finishing time after I crossed. It was 21:19, only 11 minutes under the cut-off time. At the goal reception I presented my brevet card, the receipts from PC1 and PC2 (both 7-11 stores) and showed a photograph of the viewing platform. I had successfully completed! The young couple also made it. They arrived a mere 2 minutes before closing time. Another cyclist who had punctured on the last part of the ride in the rain was over the time limit.

On the drive back to Tokyo I stopped twice at Tomei expressway service areas for some rest, as I was too sleepy. When I got home I unloaded the car, took a shower and went to bed at 02:00. Two more weekends before the 360+ km Fleche ride for which I’m preparing.

2019 AJ NishiTokyo 200 km Miura Peninsula

This is one of the last views of Mt Fuji I had last Saturday (2019-01-19), when I rode my first brevet of the year, BRM119 NishiTokyo 200 km Miura Peninsula. I also saw Mt Fuji from the Yamate area of Yokohama (near the Foreign General Cemetery), from the waterfront south of Yokosuka and from various spots on the west coast of Miura, including just before Enoshima.

This 200 km ride around Miura peninsula from Machida to Machida is one I have done before, though much of the course outside Miura was different from last year’s. There’s a 13h 30m time limit (6:00 start, 19:30 close), with two timed checkpoints and a third location for a picture check. I finished in 12h 42m. Together with my ride back to Tokyo it came to 237 km (on Strava).

First Brevet of the Year

January brevets here are always very popular and fill up quickly when the signup period opens. BRM119 by AJ NishiTokyo was no exception. It filled up the first evening.

For a 200 km ride this course has minimal elevation gain (less than 1200 m) so it’s not quite as physically challenging as other 200 km brevets (hence maybe easier for people you didn’t ride much since the end of the 2018 brevet season in October), but there are no easy brevets. In this one you trade mountains for traffic lights and some busy roads. The January chill definitely will suck your energy, especially before sunrise and after sunset. You will be using a lot of energy just to stay warm, even when simply breathing in cold air!

The temperature on the ride ranged from -1° C at the start to 19° C near Jogashima, before dropping back to 5° C at Machida. This is a huge swing that’s difficult to dress for. I have a large front bag with sufficient space for clothes (and food), but I don’t know how others handled it — probably by feeling very chilly for the first few hours and very warm during the day!

The temperature swing aside, the weather was near perfect. The sky was nearly cloudless for almost the entire day. We were spoilt by ocean views and Fuji views.

I rode from my home in Tokyo to Machida the night before, as I had booked a room at a ToyokoInn to better cope with the early start time (06:00). This is a chain of inexpensive hotels. The rooms are clean and offer all the essentials. The ride reception to pick up one’s brevet card opened at 05:00, with a pre-ride briefing scheduled for 05:30. I went to bed at 22:00 to get more than 6 hours of sleep. My alarm went off at 04:10 and I left the hotel 40 minutes later.

I was well prepared for this ride. It was my third Century (160.9+ km) ride of the month, all three of them started no later than 06:00 so I knew the temperatures before sunrise and how they would feel in what I was wearing.

These are my improvised shoe covers, a pair of old merino socks with strategically cut holes for the SPD cleats, during testing the week before:

I had more than enough clothes with me, for example a choice of a winter jacket or a windbreaker to wear on top of my LS merino jersey and I used both, at different times.

I wore most of my clothes at the start at 06:00 from Machida:

The only time I really did feel cold was when riding back to Tokyo after the event, as I hadn’t bothered to change back into my thermal underwear and base layer and consequently felt the wind chill on my hands. I improvised some poor man’s Bar Mitts ™ out of plastic bags and rubber bands that kept my hands toasty warm for the rest of the ride.

Pacing myself

During the descent towards the Tamagawa river from the west I could see the whole of Tokyo below me in the dawn, including the skyscrapers of Shinjuku and Tokyo Skytree, the 634 m broadcast tower on the opposite side of the city.

About an hour into the ride, the sun rose. It was dazzling us at times. Near Kawasaki station we hit rush hour traffic, but after that we switched to a cycling path by the riverside. After 48 km we reached PC1, the first control. Here I took off some of my layers as it was warming up.

Between there and Tsurumi we were cycling near the port area, with many trucks carrying heavy shipping containers on the road.

In Yokohama we passed Minato Mirai with its old brick warehouses and other historic buildings. After a Yamashita park we climbed up to the Yamate area, also known as the Bluff, a hillside that was home to the first foreigners who arrived in Japan for trading when Japan opened to the world in the final years of the Tokugawa shogunate. I got a surprising view of Mt Fuji from just outside the Foreign General Cemetery on the hill.

With a large group it’s always tempting to try to hang on to faster riders and I probably ended up doing that, riding a bit too fast for the first 60 km or so of the ride. Then my legs gradually started to complain and I dropped the pace and stopped for food near Yokosuka. I kept a more sustainable pace for the rest of the ride and felt pretty good. I also stopped often for pictures.

After Yokosuka you get good views of Boso peninsula on the opposite side of Tokyo bay. The scenery becomes more rural. By now the temperatures were much milder. I was riding without my winter jacket and later even removed my base layer under the long sleeve jersey.

I passed Hayama, Zushi and Kamakura on the west coast, enjoying views of the ocean and Mt Fuji. After Enoshima the road turned off the coast and headed north. I had a comfortable time buffer and didn’t have to worry about control closing times.

It was still daylight at PC2, the last control. From here it was 31 km to the goal. Once the sun set, the silhouette of Mt Fuji in the dusk was still visible to the west and I stopped a couple of times for more pictures.

I arrived at the goal with about the last fifth of the participants still behind me. AJ NishiTokyo staff served hot drinks and snacks. We talked and took some pictures of each other and the arriving finishers.

Outlook into the season

My next brevet will be a 200 km ride in west Izu at the end of March which will be a lot more hilly, but before that I will do at least one Century ride in February. In April I will be participating in a Flèche as part of a mixed 5 person team riding 360 km in 24h to meet up with other Randonneurs in Tokyo. Most likely I’ll also be riding a 400 km brevet in May.

I am not aiming for a 600 km ride or for completing the Super Randonneur series (200, 300, 400 and 600 km) this year, let alone participating in Paris-Brest-Paris 2019 in August. Rides up to 400 km are enough of a challenge for me 🙂

Strava Cycling Climbing Challenges

Strava is a popular service for logging bike rides and other activities, which provides a way of comparing one’s achievements with those of other cyclists and runners. Competition is a powerful stimulant and a main driver behind the success of the service. Monthly “challenges”, such as a Gran Fondo (a ride of at least 100 or 130 km, depending on the time of the year) or a monthly cumulative distance or elevation gain challenge, are particularly popular on Strava.

While I regularly participate in the Cycling Distance and Gran Fondo Challenge, I do not normally sign up for the Cycling Climbing Challenge, which is meant to encourage you do ride hilly courses. I love hilly courses. In fact, most of my weekend rides are hilly, usually going from close to sea level to over 900 m and back.

Last year I averaged one century ride (at least 160.9 km / 100 miles) about every other week, so the Gran Fondo challenge is not really that much of a challenge for me. My typical centuries are about 170-190 km with 1800-2100 m of elevation gain. Yet at 7500 to 8000 m the goal for the Cycling Climbing Challenge is set so high, I could do a hilly century ride four Saturdays in a row and still miss the climbing goal. So how do other people, who do not ride 170 km into the hills every other weekend complete the climbing challenge?

I think the Strava climbing goals are designed for people who record their rides with phones or other GPS devices that rely only on satellite data for elevation. GPS-based elevation data is much less precise than lattitude-longitude data. Other popular GPS units like the Garmin Edge 1000, Garmin Edge 520 (or my o_synce Navi2coach) use a barometer for more precise elevation tracking. The problem with GPS-based elevation is that it’s noisy, it will go up and down pretty randomly but all those little ups will be added up by Strava, resulting in a considerably inflated climbing total. If you’re using a GPS device measuring relatively accurate barometric elevation, you can’t really compete against all that noisy data 🙁

I could confirm this in group rides with other people who were using mix of equipment, where I had a chance to compare the posted stats on Strava afterwards. The iPhone or Android-app recorded totals were often 50-100% higher than the Garmin-recorded totals, for one and the same course.

Here is one random example of 4 people doing the same course up a volcano in Tenerife, Gran Canria yesterday. Note, this not my ride, I just randomly stumbled on it while looking at high scorers in the March Cycling Climbing Challenge on the Strava website. Two of these cyclists were using the Strava iPhone app, the other two were using a Garmin Edge 520:

Strava iPhone App:
https://www.strava.com/activities/1437744625
5,080m

Strava iPhone App:
https://www.strava.com/activities/1437728113
4,635m

Garmin Edge 520:
https://www.strava.com/activities/1437709764
2,847m

Garmin Edge 520:
https://www.strava.com/activities/1437730812
2,556m

As you can see, the two cyclists using the phone app posted almost double the total climbing for the course as the Garmin users, despite riding the very same roads and posting the same elevation profile for the activity (i.e. no hill repeats).

Based on evidence like that, I don’t think elevation gain competitions on Strava are happening on a level playing field! 😉

Downloading routes from RouteLabo (Yahoo LatLongLab)

Most of the brevets I ride are with AJ NishiTokyo, a randonneuring club based in the Machida/Sagamihara area. One thing I like about their rides is that they provide a link to a RouteLabo page for each event (RouteLabo is an online map service run by Yahoo Japan). This page shows a map of the course as well as download links for KML, GPX and TCX files of the course. By copying these files to your GPS device (Garmin or other) or by uploading a KML file to Google “My Maps” for your smartphone, you can almost completely do away with the need for paper cue sheets. I navigate all my brevets and many of my personal rides by following a “breadcrumb trail” on the screen of my GPS unit.

Unfortunately other clubs often only provide a map without any download option, like this Randonneurs Tokyo 2018 BRM421 Tokyo 600 Lake Hamana (BRM421東京600浜名湖鰻) page:

This does not help you much on the road. Without a link to the full RouteLabo page with download links, there’s no obvious way to obtain a GPX or KML file. You are still expected to navigate via printed turn instruction on a paper cue sheet, which I find cumbersome and error-prone.

However, there is a way!

The web page uses some Javascript code to display the map off the RouteLabo website, including a magic value that identifies the particular course to be shown. To see this value, view the source code of the page. This step varies by browser and operating system. On Chrome under MS Windows, Ctrl+U will show the source code, on a Mac under Chrome, Option+Command+U will do it. On Safari, once you enable the option via Safari > Preferences > Advanced > Show Develop Menu, you can also use Option+Command+U (just like in Chrome).

In the displayed HTML code, search until you find a line for Javascript like this one:

<script type="text/javascript" encoding="UTF-8" src="https://latlonglab.yahoo.co.jp/route/paste?
id=b86f940851b6ebed2538ffc5f80b2fc8&width=480&
height=640&mapstyle=map&graph=true&maponly=true"></script>

The value consisting of 32 hexadecimal characters (128 bit) after “id=” is the magic value you’re looking for. A full RouteLabo page URI with the download options will look like this:

https://latlonglab.yahoo.co.jp/route/watch?id=b86f940851b6ebed2538ffc5f80b2fc8

By replacing the value after “id=” in the URI with the ID from inside the HTML code using copy and paste, you will get a browser URI that will give you full access to the route, including route file download links to feed your GPS device of choice. You can then bookmark it for future reference. Bonne route! 🙂

A hilly 200 km brevet in scenic Izu peninsula

Yesterday I cycled 200 km across the mountains of west Izu (Shizuoka prefecture, Japan) on my Bike Friday folding bike. I had resolved do at least one century ride (160+ km) every calendar month of this year, some of them organised events, but most personal rides. BRM309 200 km by AJ NishiTokyo was my first official brevet of the year. I completed it in an official time of 12:58, i.e. just over half an hour under the 13 1/2 hour time limit.

The scenery was beautiful and the weather perfect but the course tough. With a highest point of 450 m, I first found it hard to believe that this course should really have more climbing (3159 m total) than the 300 km Fuji brevet I did last May (2800 m total), but except for the first and last 10% and some short stretches through the towns on the coast, this was a pedal-powered roller coaster! On the smaller roads grades of 8-11 percent were not uncommon.

I loaded the Bike Friday into the Prius the night before (no need to fold the bike or take off the wheels), went to bed at midnight and got up at 04:00. A little after 06:00 I got off Tomei expressway at Numazu and drove near Mishima station, where I found a 1000 yen ($10.50) a day car park. One couple dressed like randonneurs was already setting up their bikes in there.

An hour from home on the expressway it had suddenly struck me I had left my reflective vest at home. No vest, no brevet! But it was already too late to turn back. Fortunately the organisers had some stock and sold me one for 1600 yen ($17). To start with I was wearing new bib shorts and new jerseys (two layers for the morning and evening chill). GS Astuto’s HauteRoute shorts proved exceptionally comfortable, like wearing your best pair of pajamas at home. I sweated a lot, in fact my cheeks were white with salt afterwards, but the shorts and jersey kept me comfortable. The deep pockets safely stored wallet, camera, keys and some food.

There were 60 riders in two blocks of 30, starting at 7:30 and 8:00. They started us in smaller groups. I was wearing my heart rate belt and wanted to aim for a consistent workout throughout the day, but I worked much harder during the first 50 km than I had intended and less hard later on. When you have some other fast guys to follow (which would save you having to navigate) it is tempting to hang on at whatever cost. We headed through town and along a river to the south. After 20 km the route started climbing, peaking at a tunnel about 450 m above sea level, then down to the coast. We made the first 50 km in 2 1/2 hours, putting me more than half an hour ahead of the pace needed for completing in time, and that is what I also finished with.

I glimpsed Mt Fuji across the bay from near Toi.

The coastal road went to Matsuzaki through many tunnels and a couple of climbs. After Matsuzaki we climbed the second highest pass on a small mountain road and it was very pretty. Plum trees (ume) were in bloom everywhere.

PC1 (point de contrôle 1) was at 95 km, almost at the half way point, but there had also been a safety check at the first tunnel (lights!). We were given pastries baked in the shape of bicycle cranks.

From the control point we headed west to the coast, which we mostly stayed on. As mentioned before, the coastal road goes mostly up and down. It only becomes level again at the north west corner of Izu. The top third of the west coast was the hardest part. There were few villages, no shops and it was gradually getting dark. I had somehow expected the second half of the ride to be easier than the first because the maximum elevations were much lower, but it was actually harder. Between Toi and the north coast there were no flat portions in towns between descents and climbs, because there were no towns (or more appropriately, there were no towns there because there was no flat land).

The following was a sign we had to spot and then write down the Kanji characters, as part of a quiz question. As a Kanji-challenged foreigner, I got dispensation to bring back a picture instead:

Izu used to have a lot of terraced rice fields built into the hills because there wasn’t much flat land. Much of these fields now lie fallow or have been turned into sugi tree plantations contributing to the hay fever epidemic in Tokyo.

Mt Fuji at dusk:

I completed!

Having my brevet card checked at the finish:

Garmin Edge 500 on long rides

Since January I’ve been using a Garmin Edge 500 with heart rate monitor strap for logging bike rides. Garmin quotes a battery life of “up to 18 hours”. After this 13 hour bike ride, it showed a remaining battery capacity of 21%. Extrapolating from this, the battery would have lasted about 16 hours in total.

I was not just logging the ride (GPS data) but also using the heart rate strap and had the Garmin track a course with turn-by-turn instructions, which probably draws a bit more power. I had created the course as a TCX file in RideWithGPS while looking at the course as published on http://latlonglab.yahoo.co.jp.

In any case, 16 hours is enough for a 200 km brevet with its 13 1/2 hour time limit, but not enough for a 300 km brevet with its 20 hour limit, unless you are a really fast cyclist and/or the course is extremely flat. For my 300 km brevet I am planning to use my Garmin Edge 500 power hack, a special USB cable that allows me to charge the device while logging and navigating.

Garmin Edge USB power hack

I use a Garmin Edge 500 for recording most of my bicycle rides (I do at least one ride of 160 km or more per month on my Bike Friday Pocket Rocket). One problem with the Garmin is that some of my rides will take longer than the Garmin’s battery will last, but if you try to use an external power source to top up the charge, it will instantly end the recording. Here is my working solution:

Garmin quotes “up to 18 hours” of battery life, but last May I did a 300 km brevet with a 20 hour time limit. There are also 400 and 600 km brevets with 27 and 40 hour time limits (I am not thinking about 1200 km events yet!). While the Garmin has a USB port that it can be charged from using a cable, it won’t normally operate as a GPS unit while connected to a USB power source. Any GPS recording under way will instantly be terminated when you plug in the cable. So what can you do about that?

I searched a bit on Google and found that when you plug a USB cable into the socket at the back of the Garmin, it tests pin X on the USB mini connector. On normal cables (including the one that comes bundled with the Garmin Edge 500) that pin is left disconnected. Unless it finds it tied to ground (GND) as you supply external power to the Garmin, it will switch into a passive storage device mode. In that mode it provides read/write access to a PC via the USB port with all GPS functionality and user interface disabled. The screen will display only the brand name and it won’t respond to any buttons being pressed. If pin X is tied to GND, it will operate normally.

This behaviour mirrors the way pin X works on smart phones that support the USB “On The Go” (OTG) specification. USB OTG allows smart phones to drive certain peripherals such as memory card readers, in the same way a PC can drive those peripherals. Normally when a smart phone is connected to a USB port, it acts as a passive storage device to which a PC can upload MP3 files or from which it can download photographs (JPEG files). With an OTG cable, the phone remains the active end. Pin X is the magic key that tells the phone which way to behave, active or passive. It all depends on whether the USB plug is an OTG plug or a regular one.

My cheap low-tech solution was to buy a USB mini OTG adapter (480 yen – about US$5) on Amazon. This has a USB mini plug with pin X wired to GND on one end and a female USB-A connector (like a USB socket on a PC) on the other. To get power into this I cut the USB A plugs off two old peripherals (such as an old USB mouse), stripped off the ends of the wires in the cable and connected black to black (GND), red to red (+5V). This was not too hard even for my soldering skills. A bit of insulating tape and voila! We have a new male-to-male cable that can draw power from any USB power source and feed it into the female end of the OTG adapter. When I plugged it all together, I could run the Garmin in GPS mode while running on external power from my USB battery.

Lawyer Note: Do not use a male-to-male cable or OTG adapter for any other purpose. Do NOT connect the male-to-male cable to two PCs. Do NOT connect the OTG adapter between a phone and a power source. Only ever connect the cable to the OTG adapter. Only ever connect the OTG adapter to the Garmin. I won’t be responsible for bad wiring mistakes or other stupid mistakes. Don’t sue me if your Garmin or house goes up in smoke!

Here is the photographic evidence that it all works for me:

You can find USB Mini OTG adapters and USB Mini OTG cables on DealExtreme (dx.com). They also have USB-A male-to-male cables and adapters, so you don’t have to make your own as I did (though it’s not difficult if you have at least very basic soldering skills). Any combination of a USB Mini OTG cable or adapter and a USB-A male-to-male cable or adapter should work.

Garmin Edge 500 with Heart Rate and Cadence

I’ve had my first week with my new Garmin Edge 500 with cadence sensor and premium heart rate monitor strap, so it’s time for a review. I bought it on Wiggle for about JPY 24,500 ($274).

Around the time I bought the Garmin Edge 500, the new Edge 510 came out. It adds a touch screen, wireless connectivity to a smartphone and various nifty new features, but is also more expensive, so I went for the existing 500.

I switched to the Garmin after more than a year and over 8,000 km of GPS logging using Android phones, mostly my Google Nexus S. Here are my first impressions (the cadence sensor in the bundled set is installed on my son’s bike for use with his 500, so it’s not part of this review):

  1. I really love being able to use a heart rate strap and it’s nice to be able to see the HR figure without having to push a button (daylight permitting). I can ride at a consistent effort level, avoiding both effort too light to build stamina and extreme effort that would lead to premature exhaustion. If money were no object, a power meter would work best (which the Garmin supports). A heart rate monitor is an inexpensive alternative that works for most cyclists wanting to improve their performance.
  2. Because of its barometric altimeter the elevation totals are much more meaningful on the Garmin than on the GPS-only phone, where they may be exaggerated by a factor of 2 to 3. Current altitude data on the Android is OK, but small variations add up too much and grades on climbs and descents may be overestimated.
  3. I love the 90 degree turn quick attach / quick release of the Garmin. It feels both secure and convenient. It is more confidence inspiring than the Minoura iH-100-S phone holder for my Android, which is generally reliable, but not 100% bulletproof. Even after using a bumper for the phone, which has improved the grip of the holder, I’ve had a few instances where on bumpy roads only the USB cable attached to the phone saved my day. I would never entrust my $300 phone to the Minoura without some kind of backup method of attachment, while I feel safe about the Garmin’s mode of attachment.
  4. Importing the rides into Strava or Garmin Connect after the ride is really easy. I just connect the Garmin to the USB cable of the PC and click “upload” on the website in the browser and the browser plugin finds the fresh tracks and uploads them. Assigning a name is marginally easier with a real keyboard than a soft keyboard on the Android Strava app. With the smartphone I could also upload rides while I’m on the road, but why do that if I’ll still add more kilometres until I get back home? That would only be a benefit on a multi day tour without laptop.
  5. One drawback of the Garmin is lack of direct Linux support. My son runs Ubuntu on his laptop, while Garmin only officially supports Microsoft Windows and Mac OS X, so he asked me to upload his activities on one of my PCs. There’s a workable solution though. When you connect the Garmin to a USB port on an Ubuntu machine, it gets mounted as a removable volume named “GARMIN”. In there is a folder called Garmin, with another folder Activities inside which contains all logged rides as .fit files. Copy those to your hard disk and then upload them manually from a browser (Strava supports .gpx, .tcx, .json, and .fit files).
  6. When leaving the house, both the Garmin and the Android take a short while to lock onto the satellites and the Android seems to have something of an edge (excuse the pun) over the Garmin, which does seem to take its time. Maybe that’s because the Android pull pull satellite position data off the web, while the Garmin can only use whatever data it captured before. In one unscientific test, I took my Android and my Garmin outside in the morning. The Android had a satellite lock in 15 seconds while the Garmin took a more leisurely 44 seconds. This is a minor issue to me compared to the next one, GPS precision.
  7. While I have seen better GPS results on some rides from the Garmin than the Android, switching from the latter to the former has not been a dramatic improvement. I think their results are still in the same class, i.e. far from perfect, especially in built-up areas. Neither is like my car GPS, which is pretty solid. Both my son and I have been riding on Strava segments in Tokyo, expecting to be ranked but found the segment didn’t show up because the plotted route was slightly off to the side, so the segment start or end didn’t match up.
  8. Having temperature data on the Garmin is nice, but not really important to me. Unlike heart rate and cadence it’s not feedback that you can use instantly in how you cycle. Your body is a temperature sensor anyway and how you dress is at least as important as the absolute temperature.
  9. The Garmin 500 battery is supposed to last “up to 18 hours”, which would cover me on everything but 300 km and longer brevets, but on any significant rides I tend to take my Android phone, which I use for Google Maps, e-mail, SMS and yes, even the occasional phone call. Using an external 8,000 mAh battery for the Android, battery life has not really been an issue. The same battery will charge either device (one at a time), provided I take both a mini and micro USB cable with me.

Summary

If my Android had an ANT+ chip or supported BTLE (BT 4.0) for using a heart rate monitor as well as a barometric altimeter, then it would still be my first choice for logging bike rides. Given the limitations of my phone and the reasonable price of the Garmin Edge 500 I am very happy with my purchase.