I recently changed from cable internet to fiber-to-the home (FTTH). The results are positive, even though the switch-over was not smooth. FLET’S HIKARI NEXT is a service operated by NTT East, Japan that provides speeds up to 200 Mbps for downloads and up to 100 Mbps for uploads over a fiber optics cable. The service also supports telephones and TV.
The idiosyncratic name of the service with the apostrophe is probably supposed to mean “Let’s go Fiber optics” and is typically Japanese (you’ll find many “Let’s …” slogans in not always grammatically correct English here). “Hikari” is Japanese for “light”.
For the 10 years that I lived in Yokohama I was a happy customer of itscom, a cable TV company and broadband internet service provider. Access was fast and reliable. What’s more, the IP address assigned to my router by the cable modem did not change for years, unless I explicitly forced a change by resetting the cable modem or I changed to a different router without cloning the MAC address of the previous router. That makes it easy to point a domain at the router, for example for hosting a website with virtually unlimited disk space on a PC on the LAN. IP address assignment happened via DHCP which is the default for most routers and PCs and basically involves no setup.
When I moved to Tokyo, I couldn’t stay with itscom because it didn’t cover our area. My son urged me to switch to FLET’S because it was faster. Also many electronic retailers offered discounts of about 30,000 yen (about US$360 right now) for FLET’S sign-ups when purchasing computers, TVs and other items. Nevertheless, I decided to avoid the potential pitfalls of switching technology and went for J:COM, a provider using similar technology to itscom. It was installed and worked OK.
Then we discovered that we had virtually no mobile phone reception in our new house. We have several iPhones, which in Japan are available exclusively through Softbank Mobile. Like ATT in the US, Softbank’s phone network does not have the best reputation for signal coverage. I guess that’s why both companies were keen to secure a deal with Apple for the iPhone.
For customers with reception problems Softbank Mobile offers a device called Home Antenna FT, which is like a small version of the base stations used outdoors, but covering only one home and hooked up via broadband. The catch was that they had only been installing these units for customers that used Yahoo BB ADSL or FLET’S HIKARI. They had no existing agreement with J:COM and no Home Antenna FT’s had been installed at J:COM cable customers before. So I finally decided I would make the switch and signed up for FLET’S HIKARI NEXT, even though I’d have to pay a fee for premature cancellation of the J:COM contract (J:COM did make an agreement with Softbank Mobile, but it was announced only after I had already signed the new contracts). While NTT East provides the fiber optics line and adapter, a separate company provides the Internet service and there are about 10 of them to chose from. Right now BB Excite is the cheapest (525 yen per month). OCN is a provider owned by NTT. We signed up for @T-COM for one year (1050 yen per month).
All the hardware was installed and tested, leaving the existing J:COM hookup largely undisturbed and available as a fallback position if I had trouble with FTTH setup. I was glad I did that. I reconfigured and connected my existing router, a Buffalo WHR-HP-G54 running open source DD-WRT firmware, from DHCP to PPPoE and entered the login user name and password sent by @T-COM. Then I released and renewed IP addresses from my PCs, but it wasn’t working.
Every time I made even minor changes to the router settings and applied them, the IP address on the WAN changed as PPPoE was renegotiated on initialization. This had a knock-on effect. I was using an ipv6 tunnel through Hurricane Electric, which lets me test out ipv6 specific software, but their tunnel can not route ipv6 traffic to me without knowing my ipv4 address. Every time my IP address changes I have to send an HTTP GET request to their server using a special URL that identifies my ipv6 tunnel. I had ipv6 set up in the router and it looked like every time the tunnel broke, DHCP stopped working in the router, which means the whole LAN fell apart. This had even happened to me itscom once, but there it was a rare problem as the IP address usually was very long lived.
So I tried my other router, a Buffalo WZR-HP-G300NH running open source OpenWRT. After setting it up for PPPoE and connecting it, the PC ended up with a 192.168.1.5 address, in a different subnet from the router and looking at 192.168.1.1 I got the ONU, not the router, just as if the router was not providing DHCP and NAT but letting the ONU provide DHCP. I checked all the settings and tried many permutations, but no luck. At some point I could no longer see the SSID of the WHR-HP-G54 when scanning from my Vista laptop, only the WZR-HP-G300NH so I thought I had to get that one working.
At midnight I reconnected the WHR-HP-G54 to the J:COM cable modem, restarted the router and the PCs and had a working system again, but no joy with FLET’S yet.
The next day I tried more things with the OpenWRT router before finally going back to the WHR-HP-G54 (DD-WRT). I gave up on ipv6 and disabled it. I managed to resolve the DNS problem by rebooting. For the occasional IP address changes I set up a batch job on a PC that monitors for external IP changes and runs a script at my registrar (regfish.com) to update the addresses for various dynamic domains so they would always become accessible again within minutes of any change.
Results
OpenWRT did not play well with PPPoE on FLET’S. I got much better results using DD-WRT, at least after disabling the Hurricane Electric ipv6 tunnel support (the 6to4 tunnel broken by the endpoint IP address change affected radvd, which was needed for DHCP, so the clients had problems with IP addresses or DNS servers that weren’t assigned).
Without ipv6, occasional IP address changes were inconvenient but solvable using dynamic DNS support at my DNS provider / registrar.
Both download and upload speed was significanty improved:
- Speed using J:COM, using PowerLAN between the PC and the router:
6.49 Mbps download, 6.24 Mbps upload, 12 ms ping time
- Speed using FLET’S, using PowerLAN between the PC and the router:
13.47 Mbps download, 11.39 Mbps upload, 11 ms ping time
- Speed using FLET’S, using Ethernet cable between the PC and the router:
24.47 Mbps download, 18.67 upload, 9 ms ping time
While I’m using PowerLAN, download and upload speed has approximately doubled while ping times have not changed much. The changing IP address has been inconvenient, but I could solved that using dynamic IP support at my registrar, who prevides the DNS service for the domain.
Duplicate networks with same connection / SSID in Vista
While trying to configure the routers for the new internet connection, I ended up with multiple instances of the same Wireless Network Connection showing (identified by one SSID, “DD-WRT-G54” in this example). See the screen shot below from a notebook running Windows Vista.
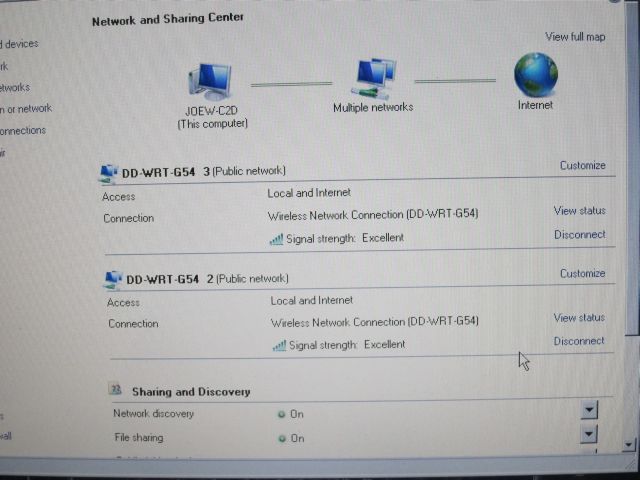
When I tried to remove either of them, both disappeared. When I then scanned for networks and it found it again, two copies would pop up again. Basically it activates and deactivates by whether or not the connection with the matching SSID has been added or not. If you have multiple networks that reference the same connection, adding or removing will always add or remove them together, it won’t get rid of just the unnecessary duplicates.
I never could figure out what caused it, but I found how to fix it:
To get down to a single network per connection again, click the Configure link in the screen. It will then give you an option to either merge multiple networks into one or to delete specific networks. Either will serve the purpose!
Photographs
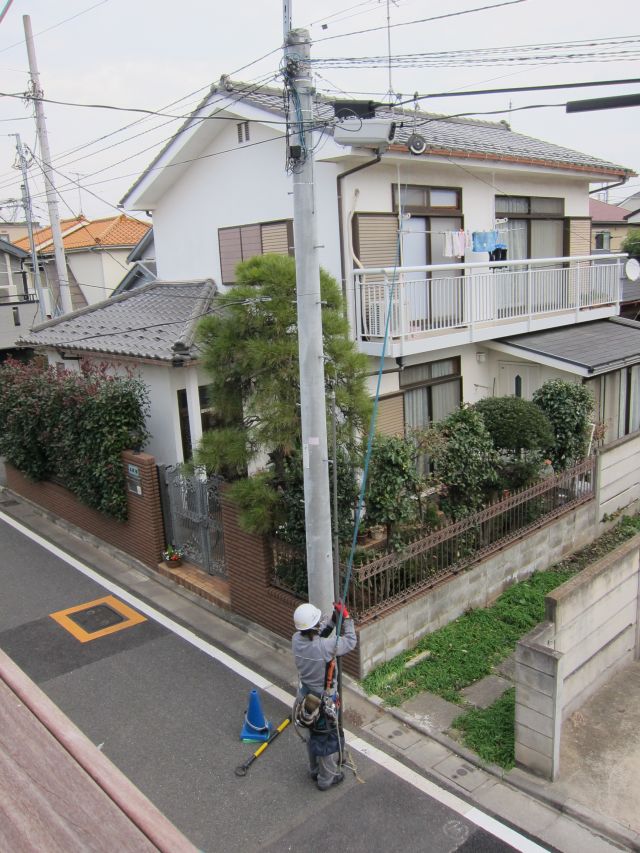
A new fiber optical cable was installed from a junction box three houses away and hung along the phone lines on the power poles outside. The cable is thinner than an Ethernet or antenna cable, only about as thick as a USB cable.
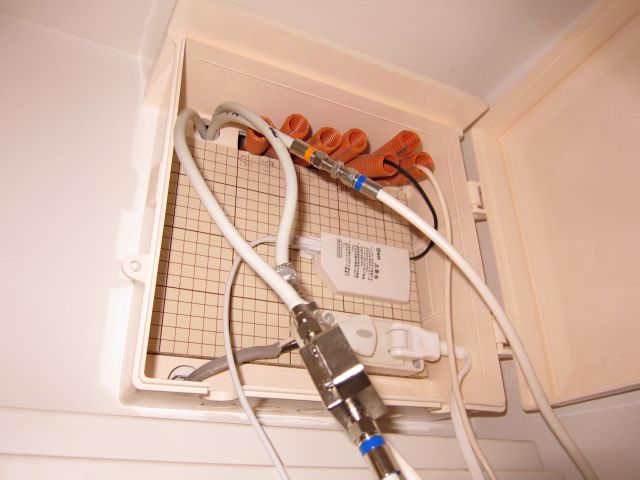
The cable entered the house through a cable duct meant for the telephone. The duct was still empty because the existing landline was through the CATV cable.
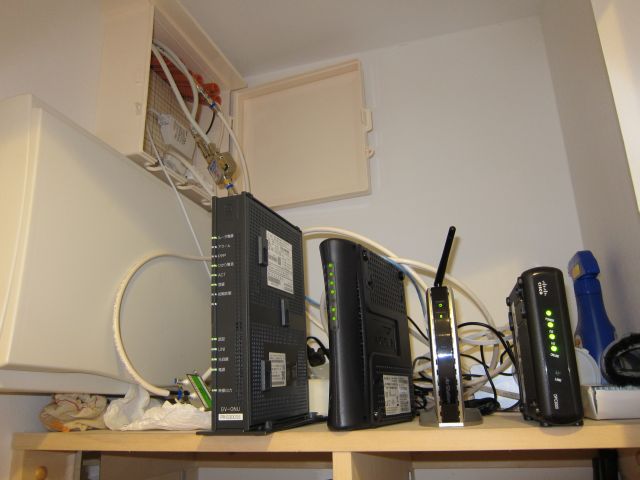
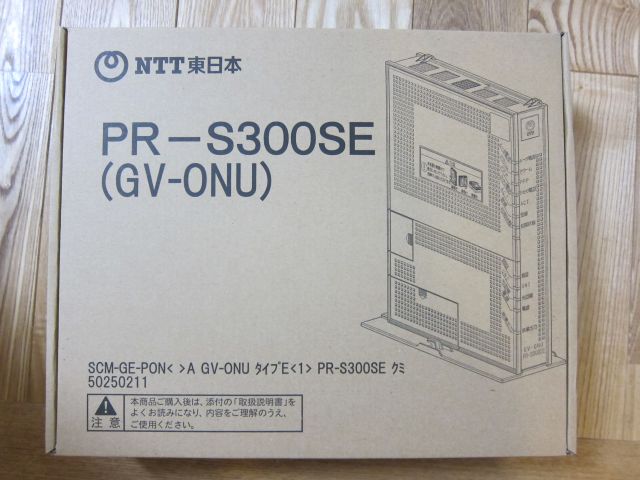
Here is the boxed Optical Network Unit (ONU) that converts the optical signals to Ethernet, analog phone and TV signals (and vice versa).
Here is the small cabinet off our entrance with the ONU, the broadband router and a cable modem and cable phone adapter from the previous provider.